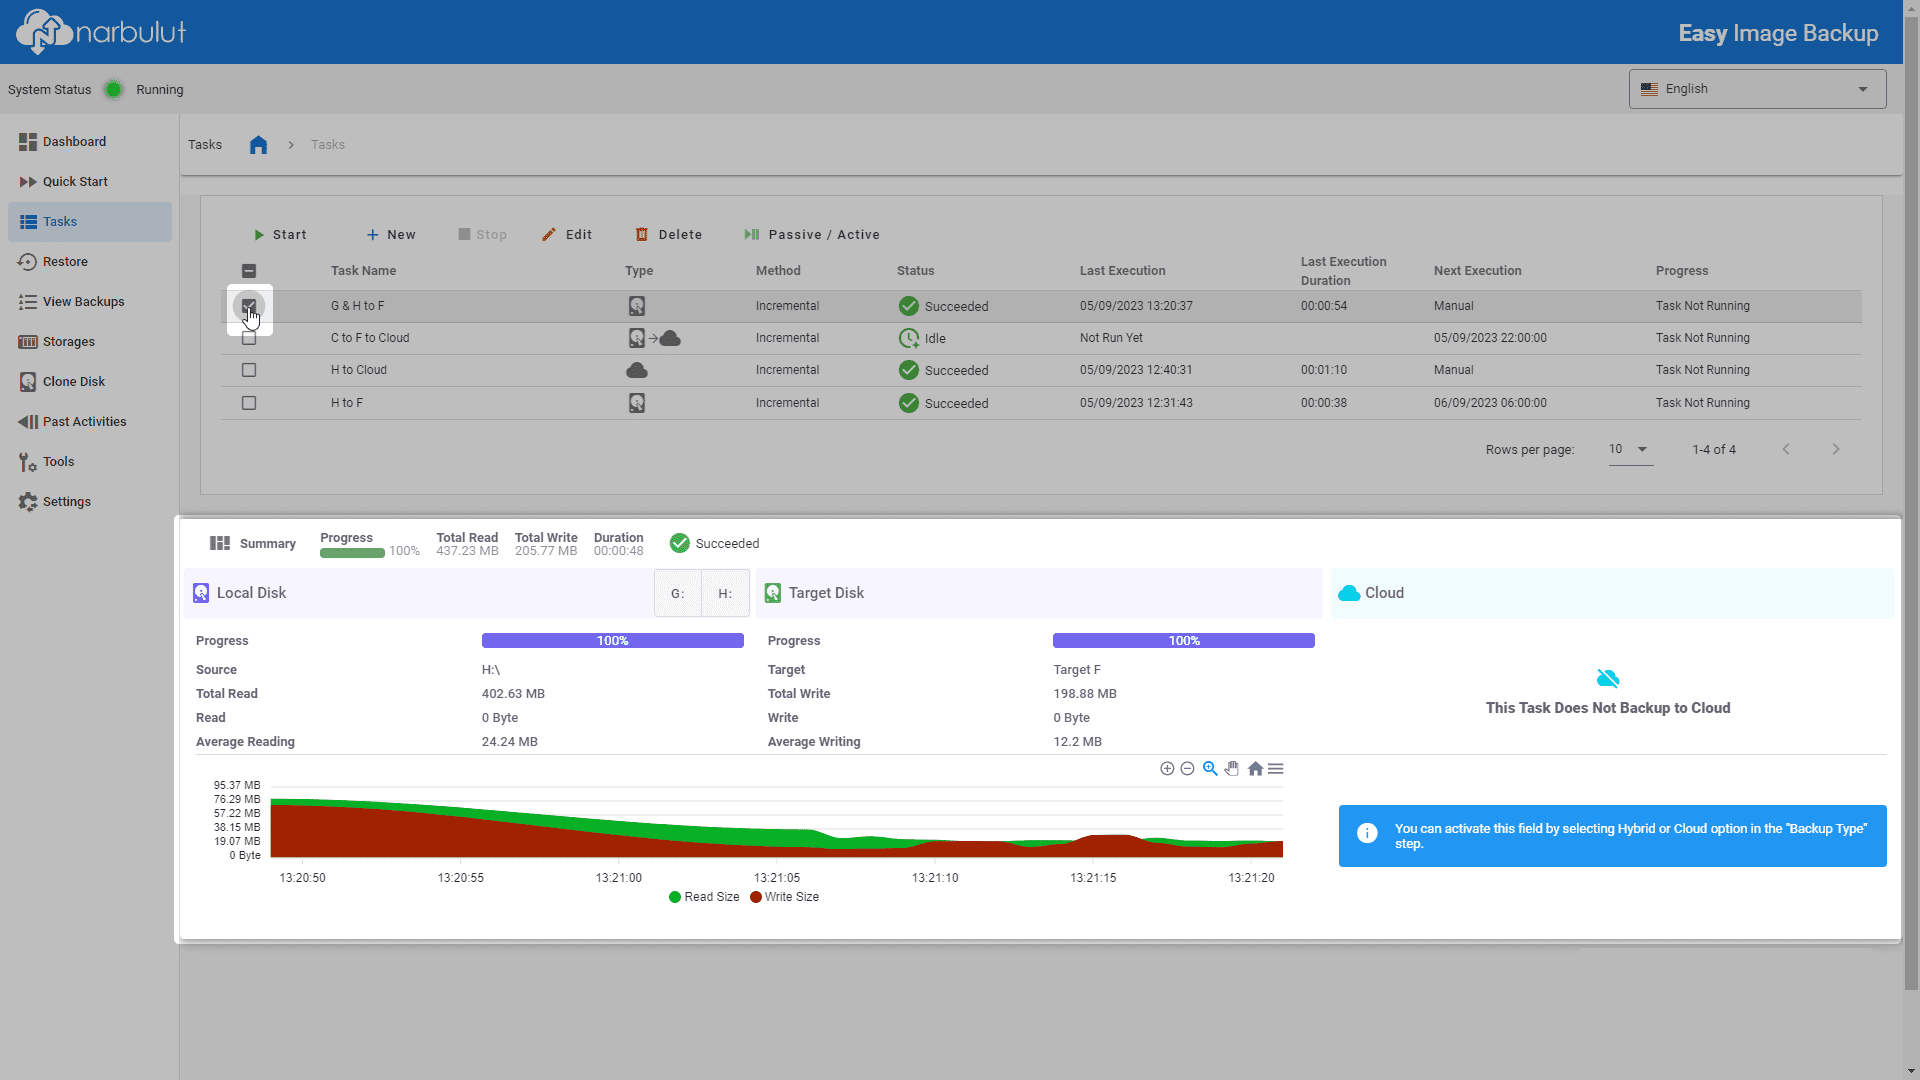
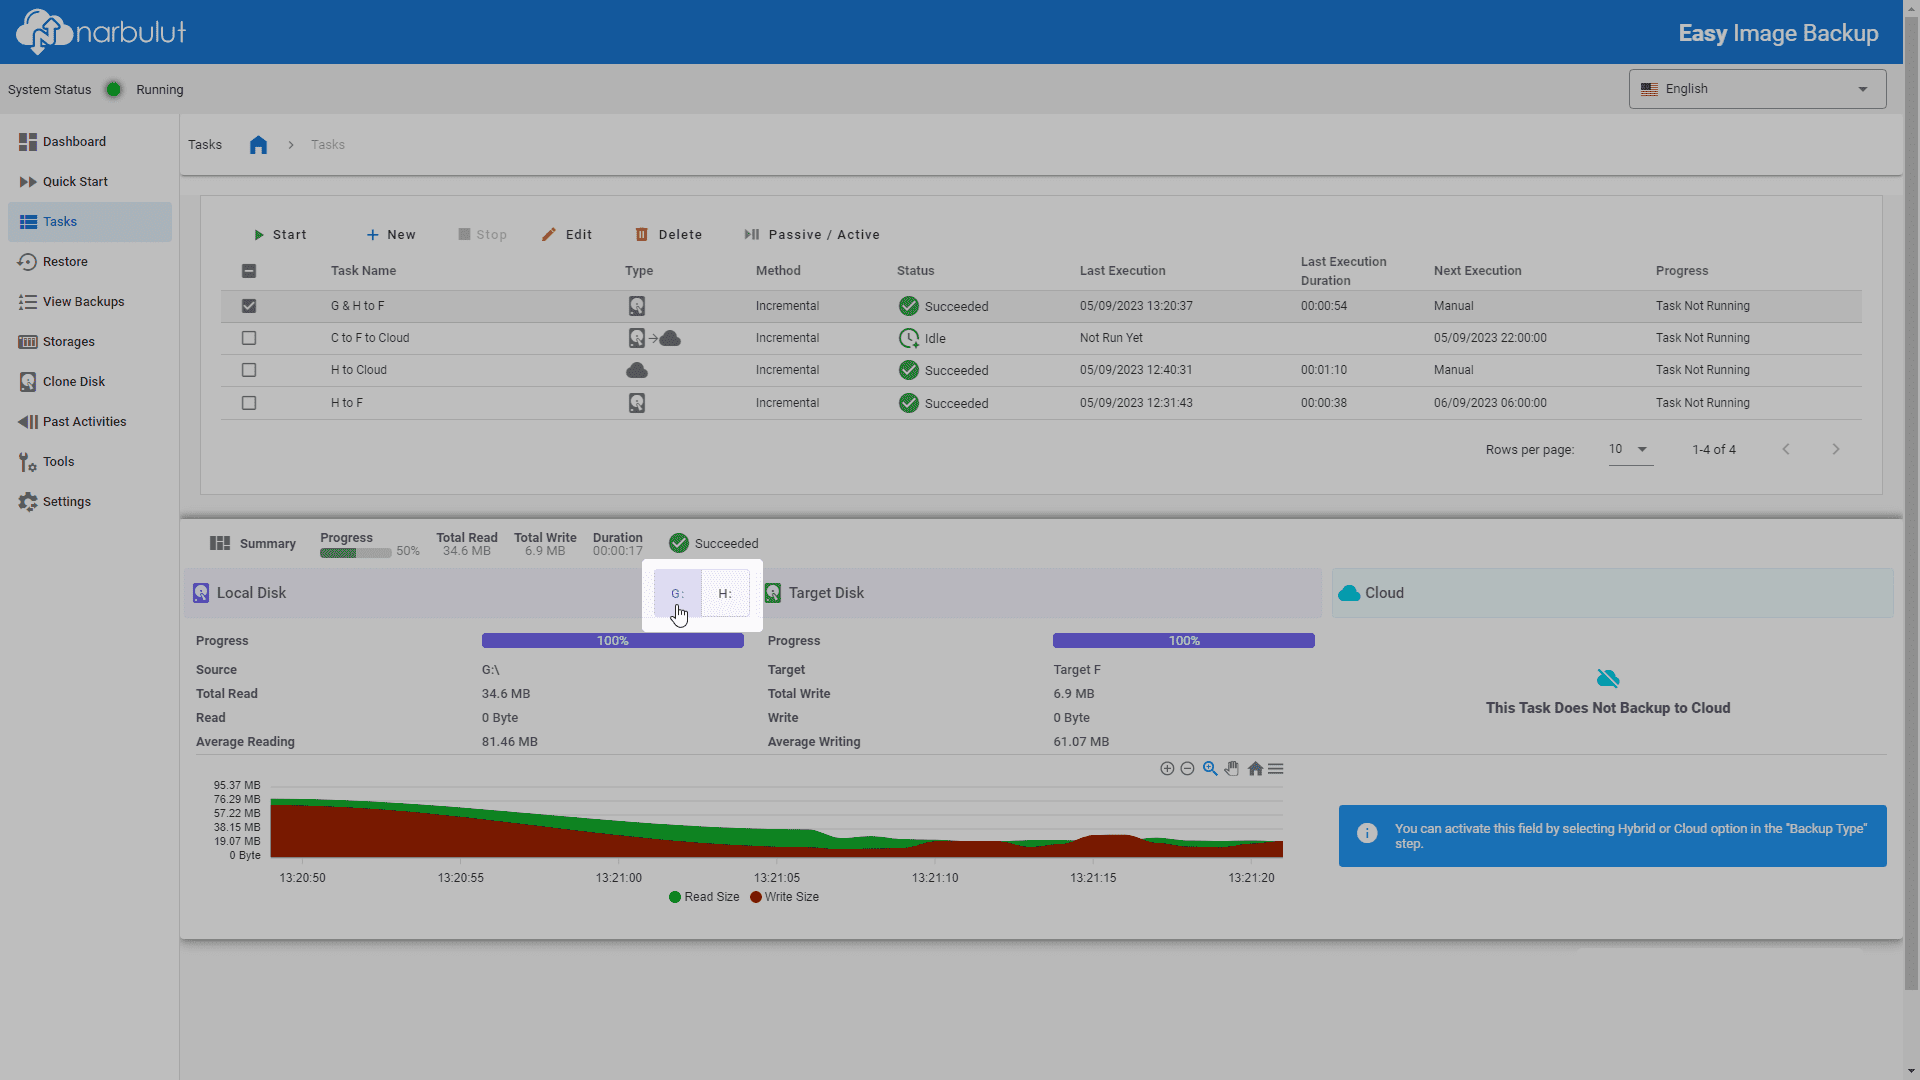
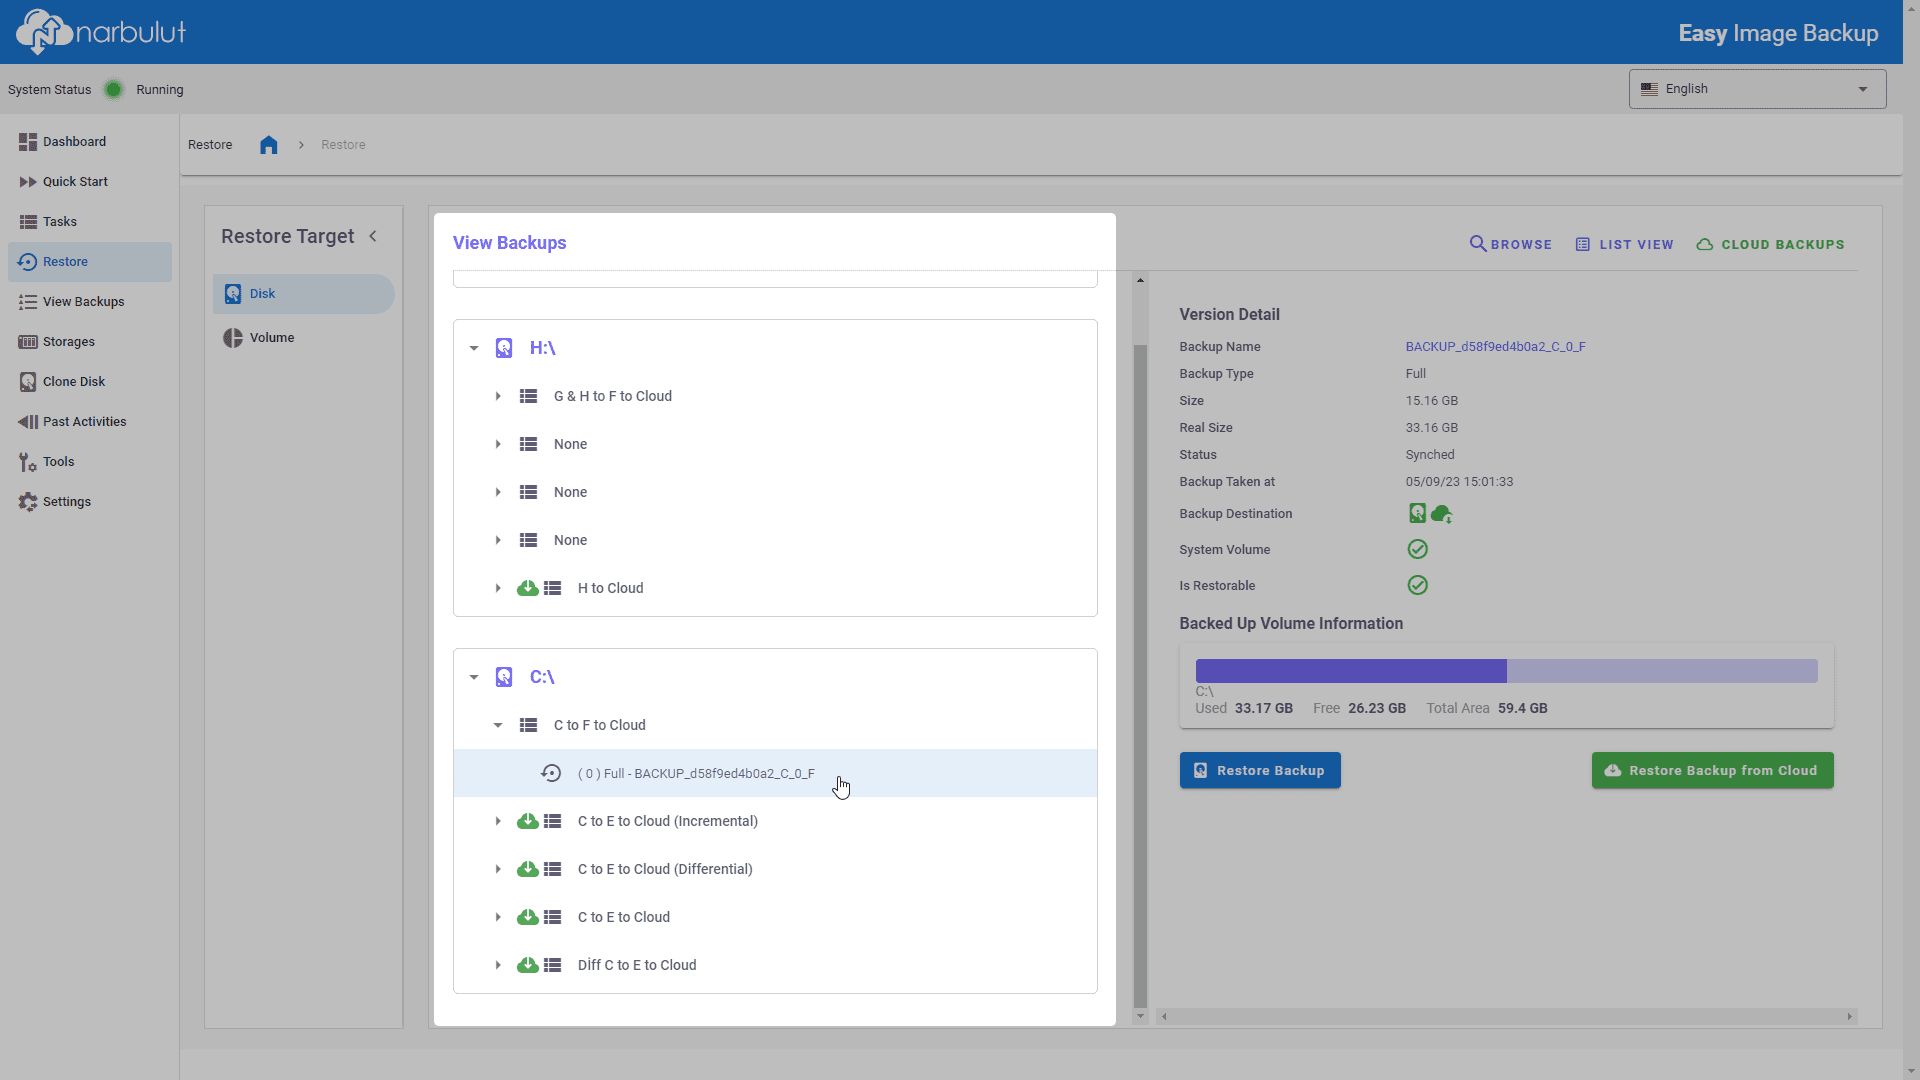
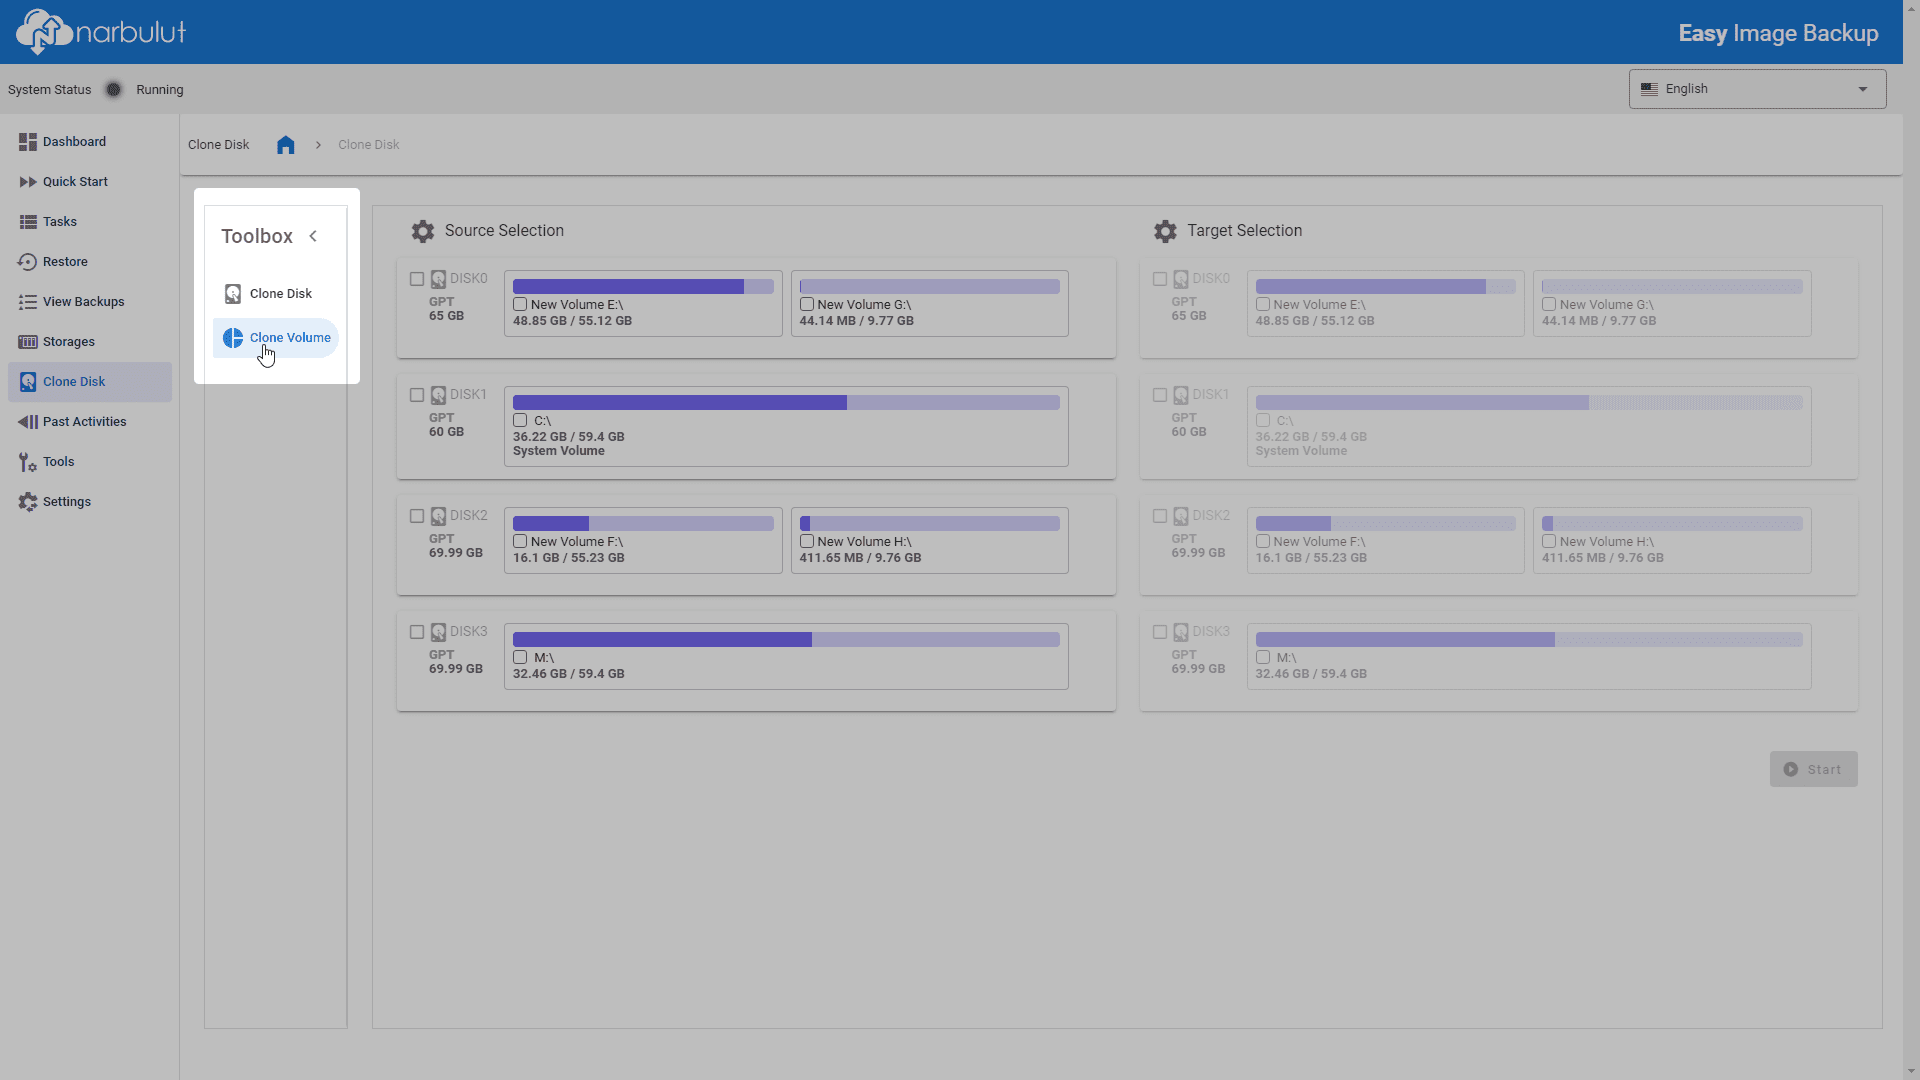
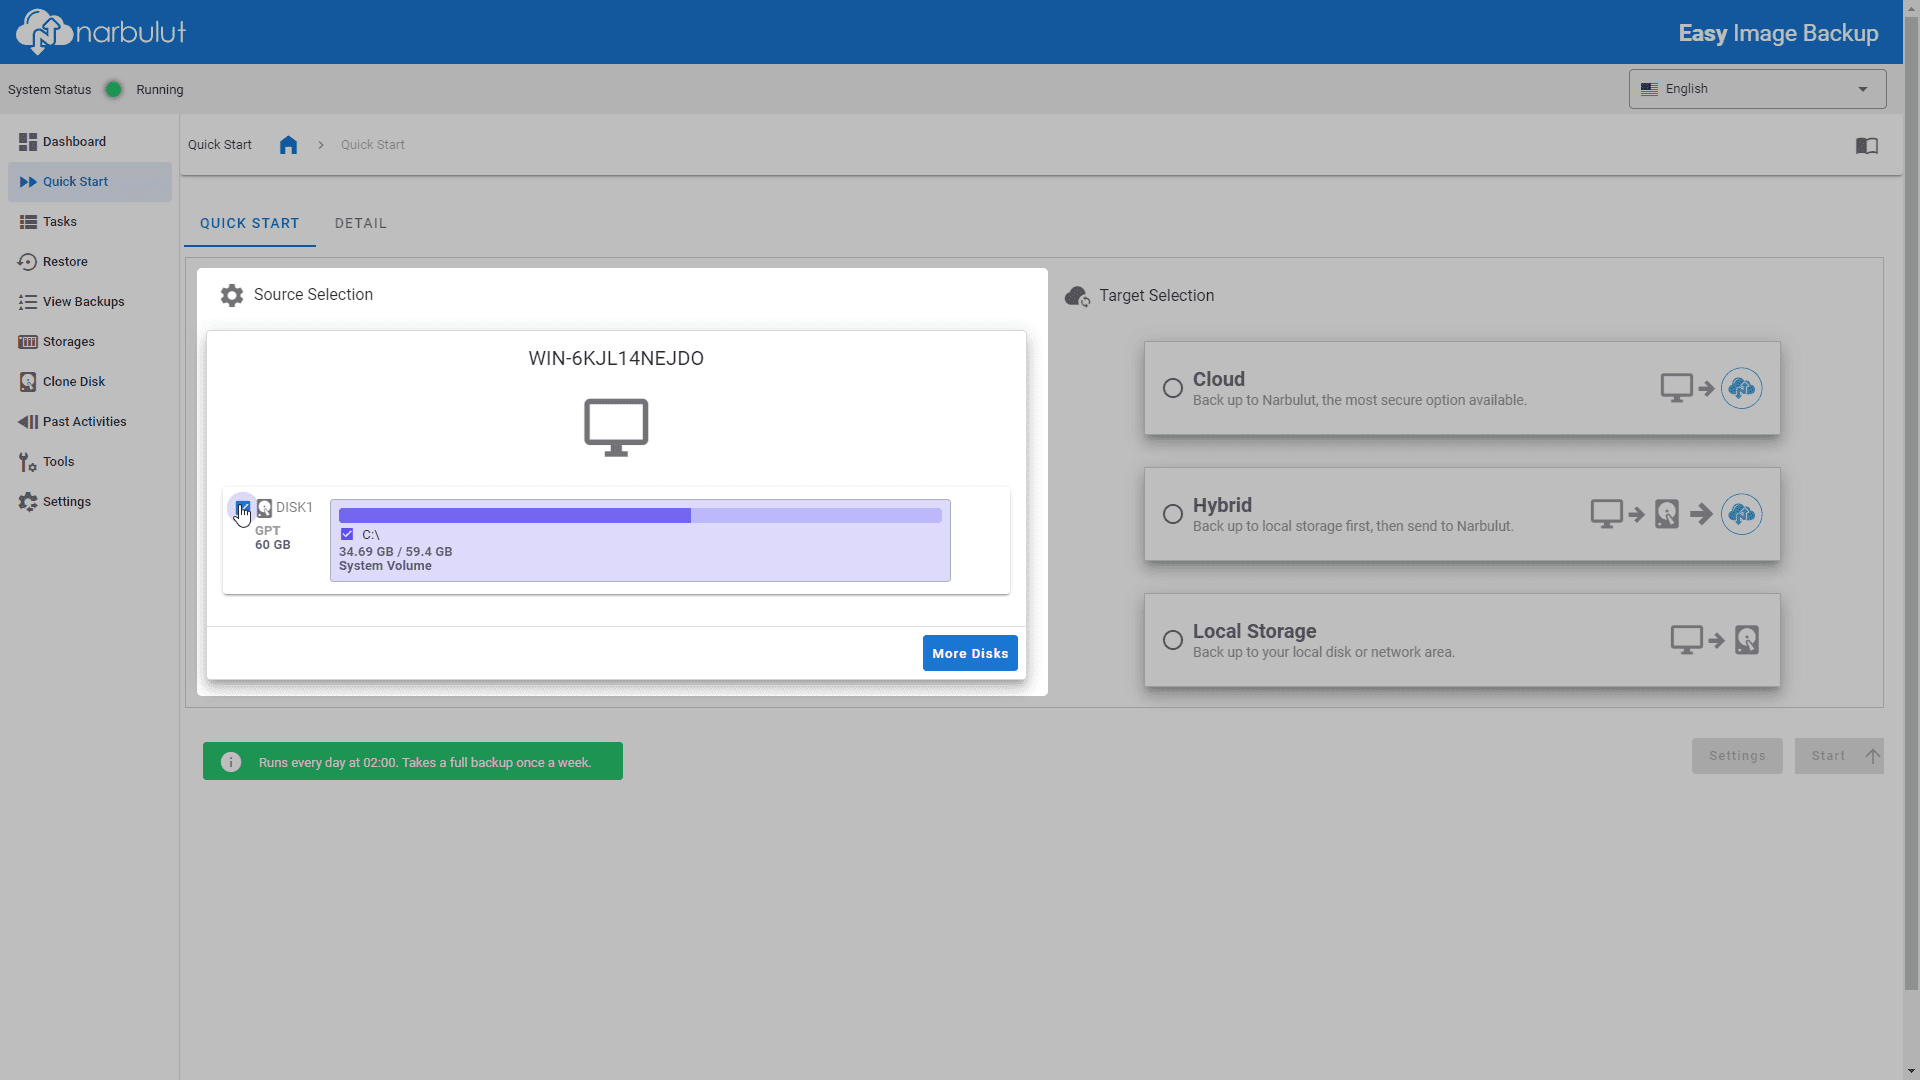
Narbulut...

This guide includes brief information about the basic matters.

Narbulut Easy Image Backup Agent Get Started Guide #

Running the Agent for the First Time #

After running the setup file that you have downloaded from https://login.narbulut.com, double-click on the agent to run it for the first time. Then sign in with your credentials same as on the panel or sign up for a free 30-day demo. After the automatic configuration, Dashboard menu will welcome you:

Agent System Status #

System status bar is located at the top of the screen regardless of the menu on display. This section provides information about the status of the Narbulut Easy Image Backup agent. There are 5 different system status groups and these statuses have their own unique colours.

System Status – Green: This indicates that agent is running without a problem and is performing general operations.

System Status – Blue: This indicates that agent is running without a problem and is working on a specific task.
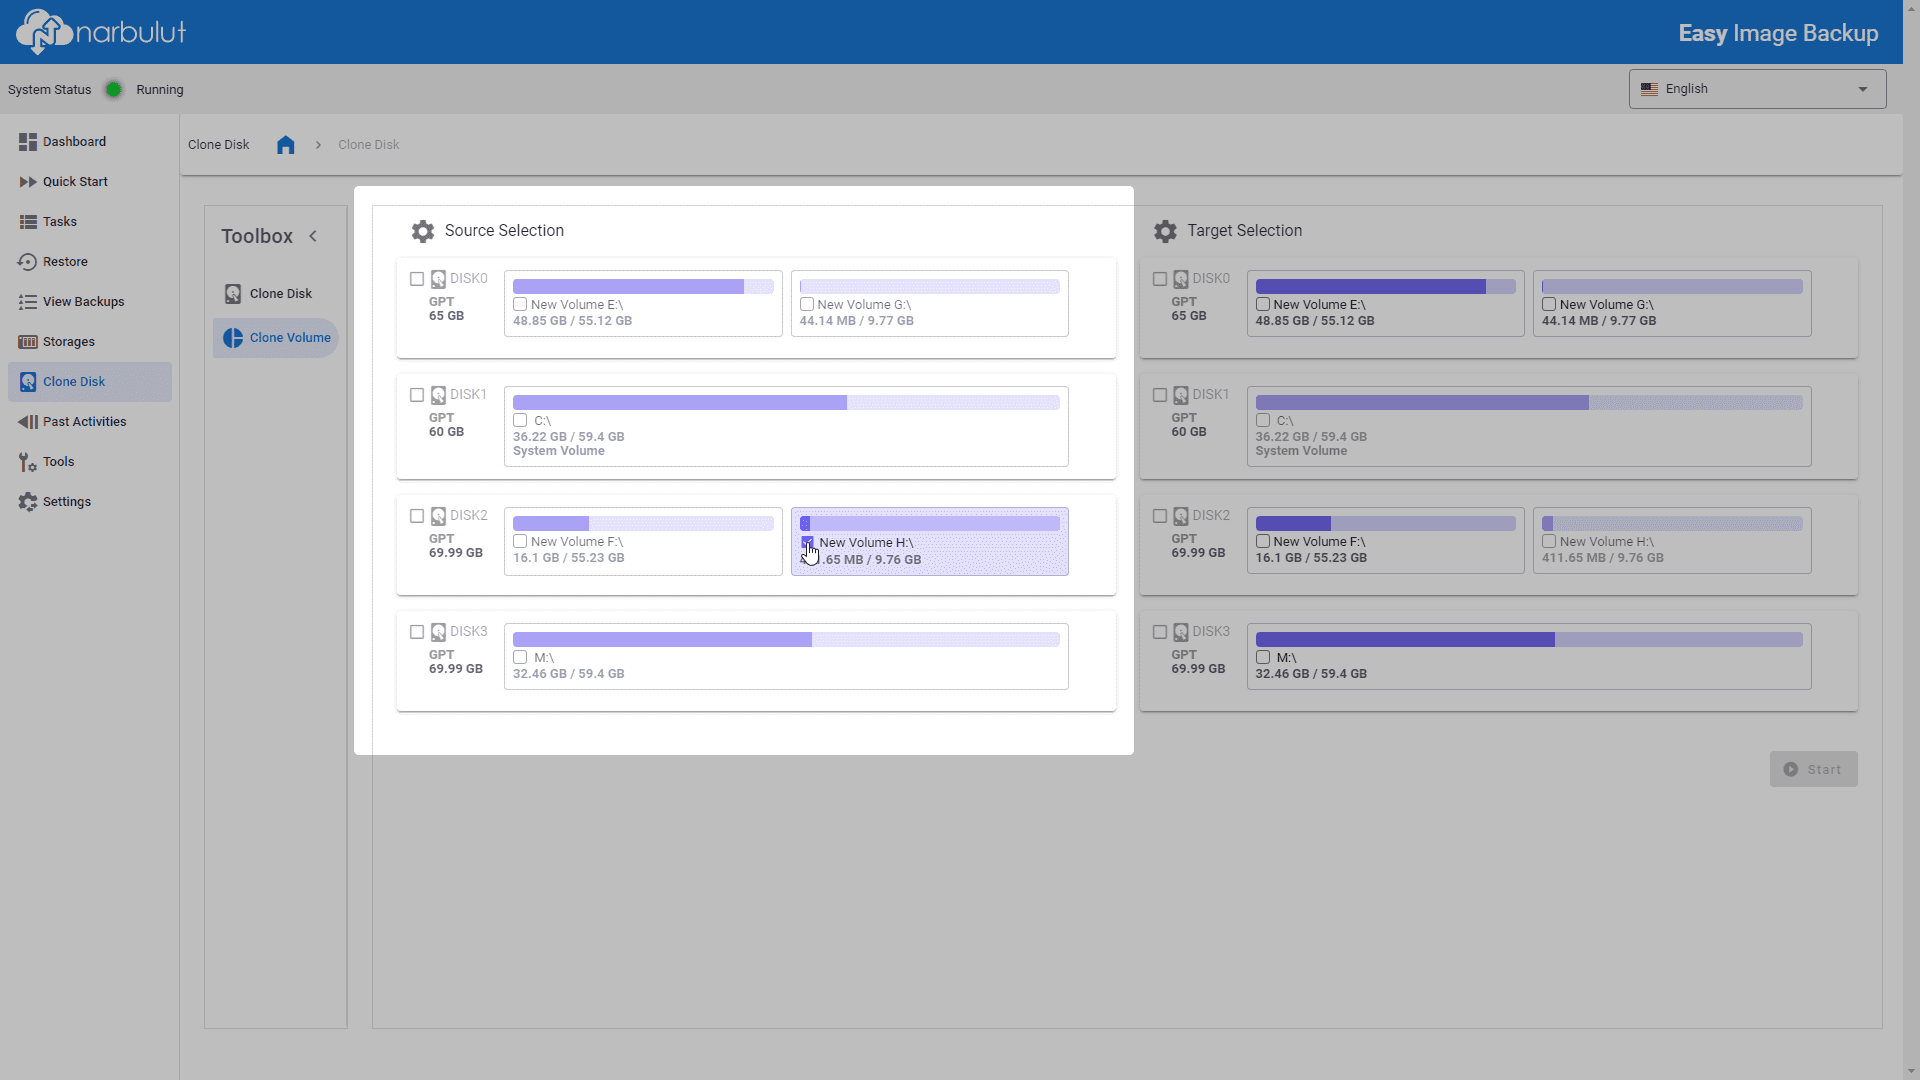
System Status – Yellow: This indicates that agent is currently running but will be stopped in the near future. These situations can be resolved by the user.
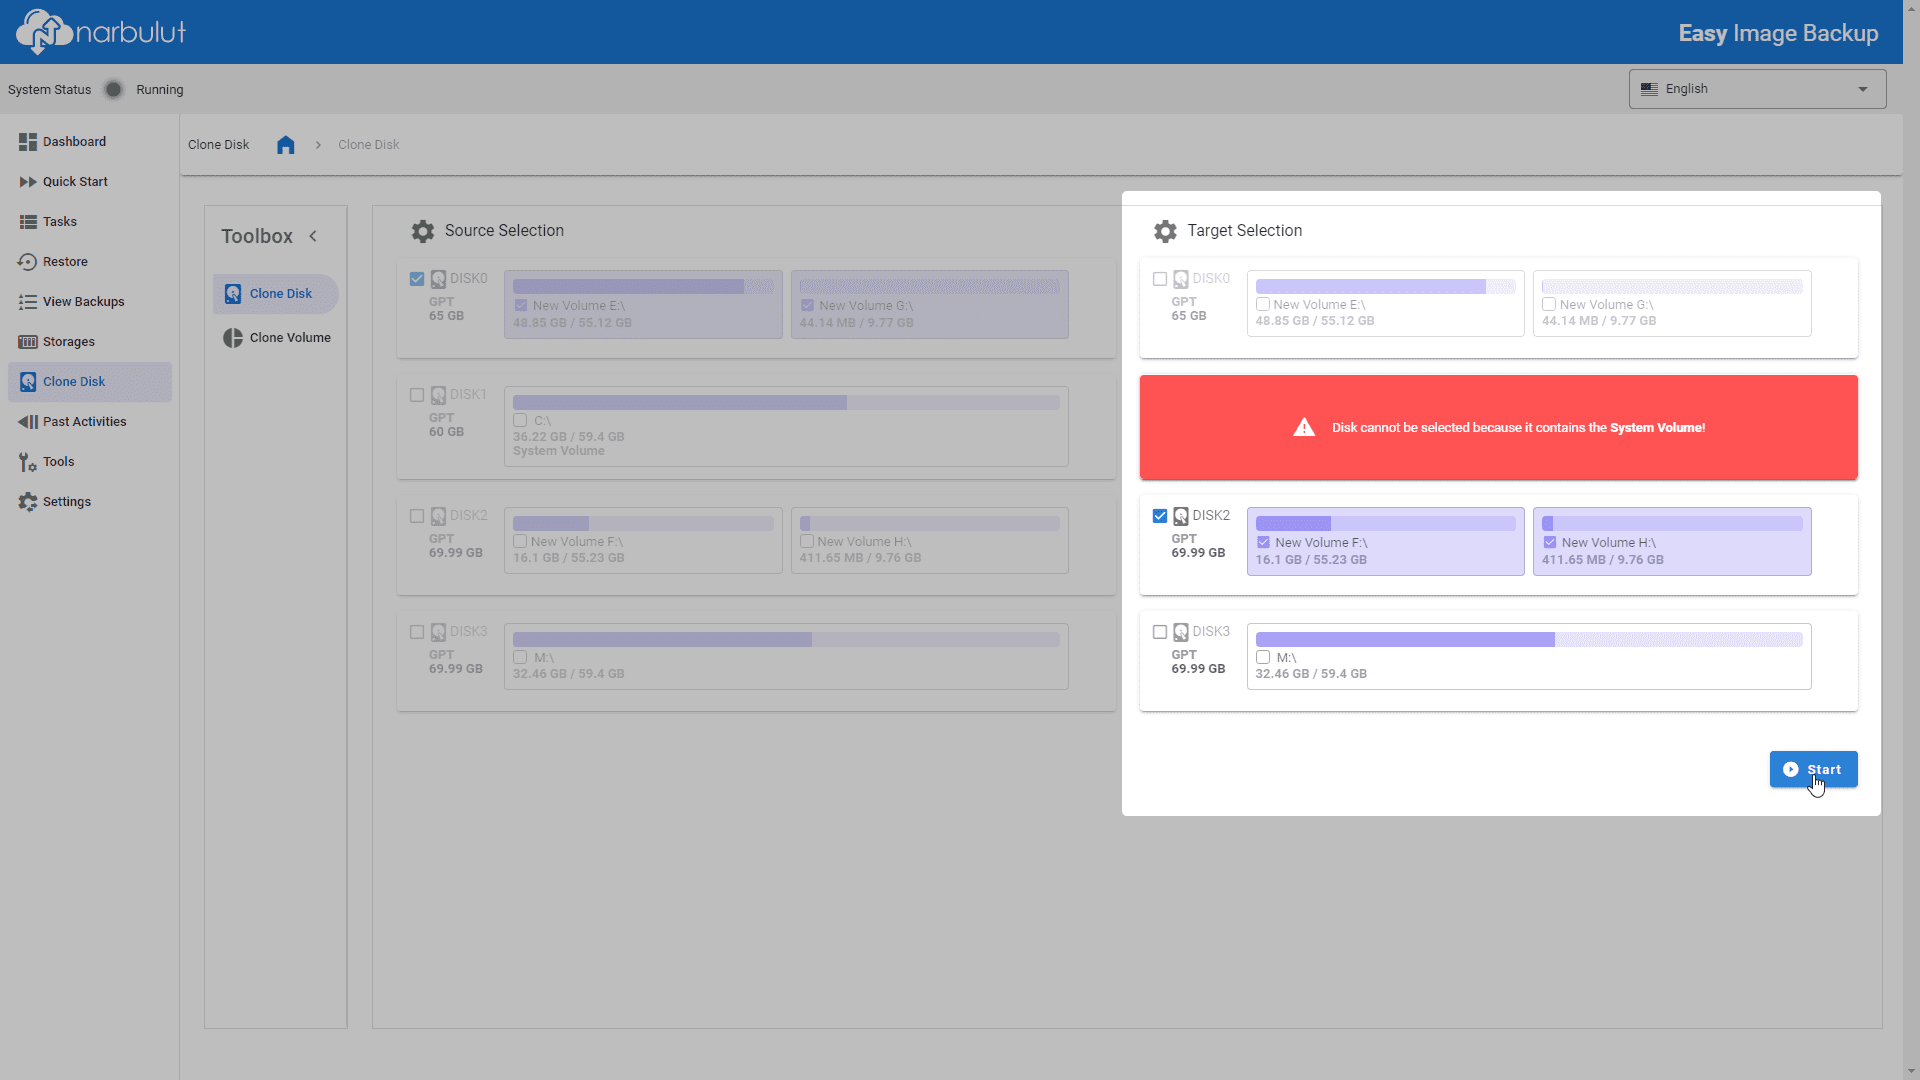
System Status – Orange: This indicates that agent is not running. In this case, the issue preventing the agent from running is user-related.

System Status – Red: This indicates that agent is not running. In this case, the issue preventing the agent from running is Narbulut-related. (E.g. Service Maintenance)  
Dashboard #

In this menu, you can find data such as statistics about running backup tasks, disk read and write statistics, cloud and local storage quota information, and periodic operation charts.

Quick Start #

This menu allows you to create and start a pre-configured task for quick disk backup operations. You can also configure your task manually in the same menu.

Starting a Pre-configured Task #

From the Source Selection, select volumes and/or disks you want to back up.

From the Target Selection, specify the target location for the backup operation.

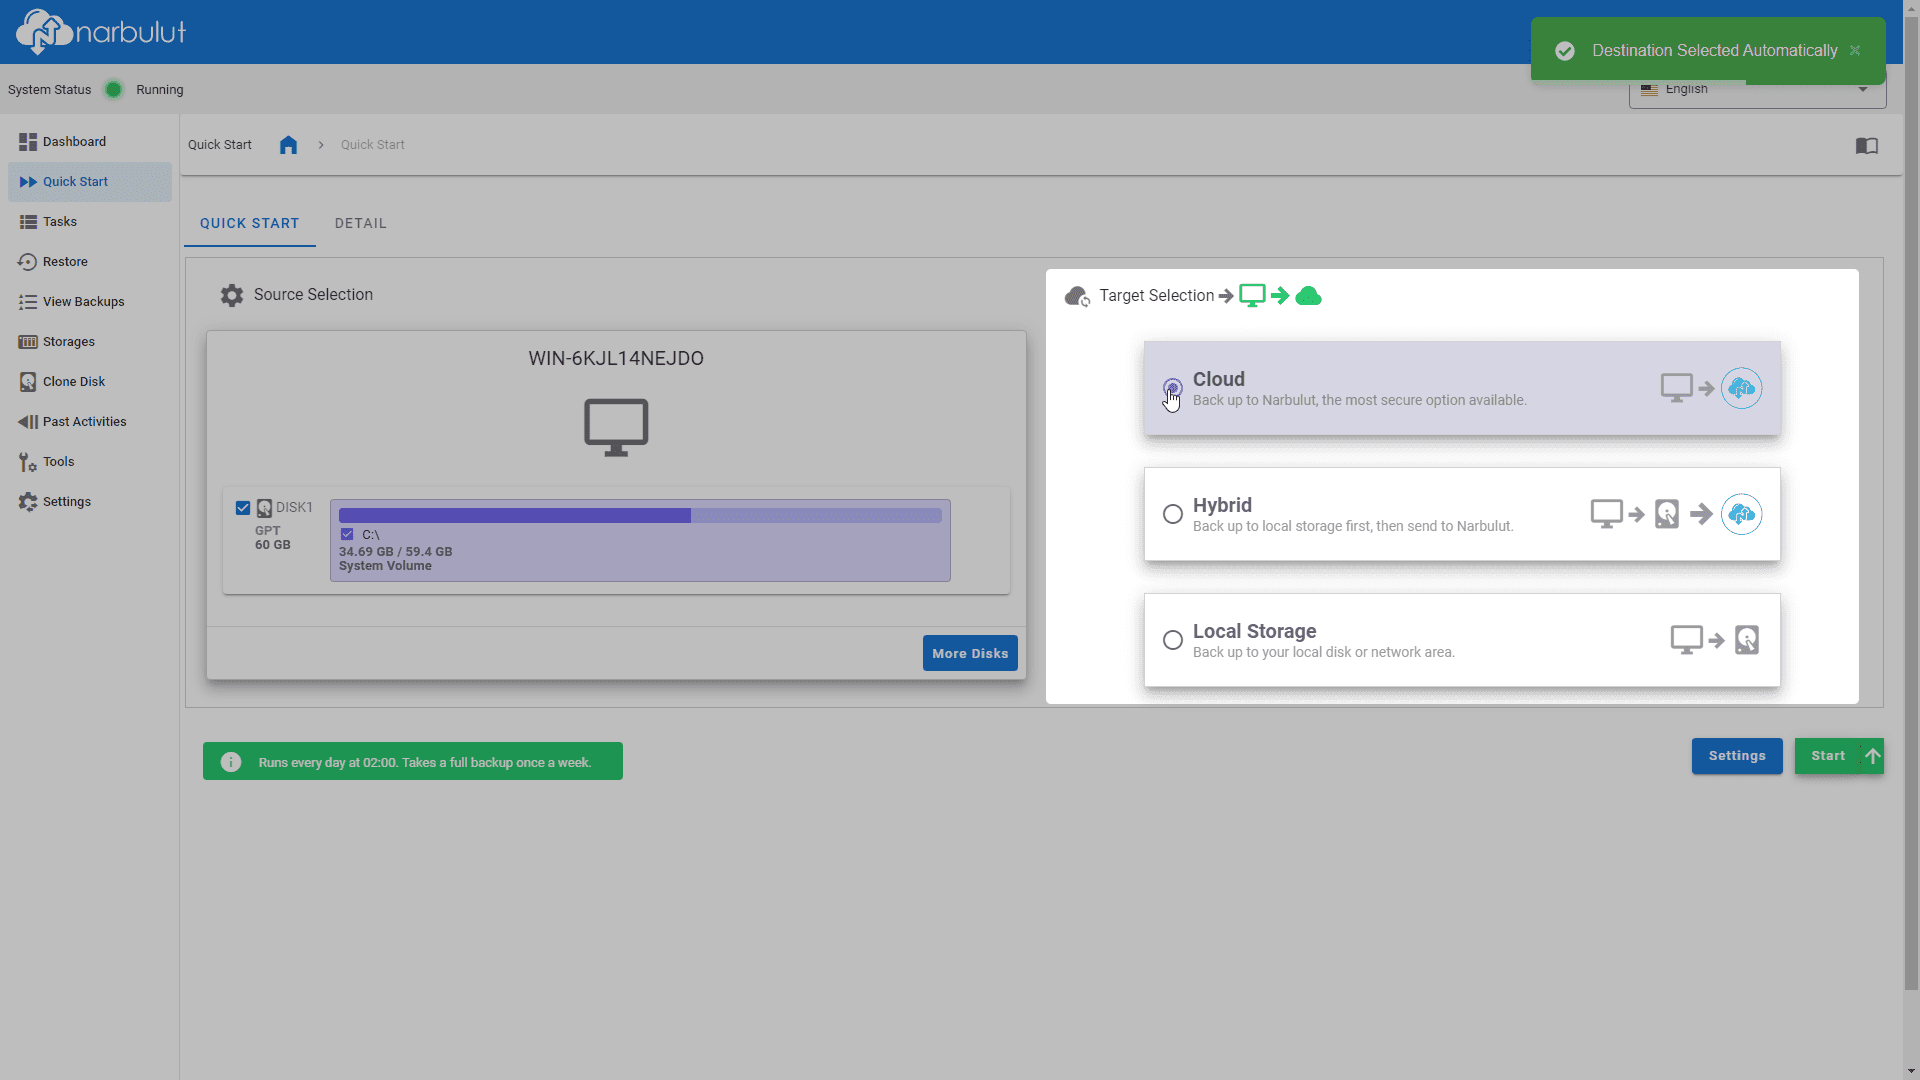
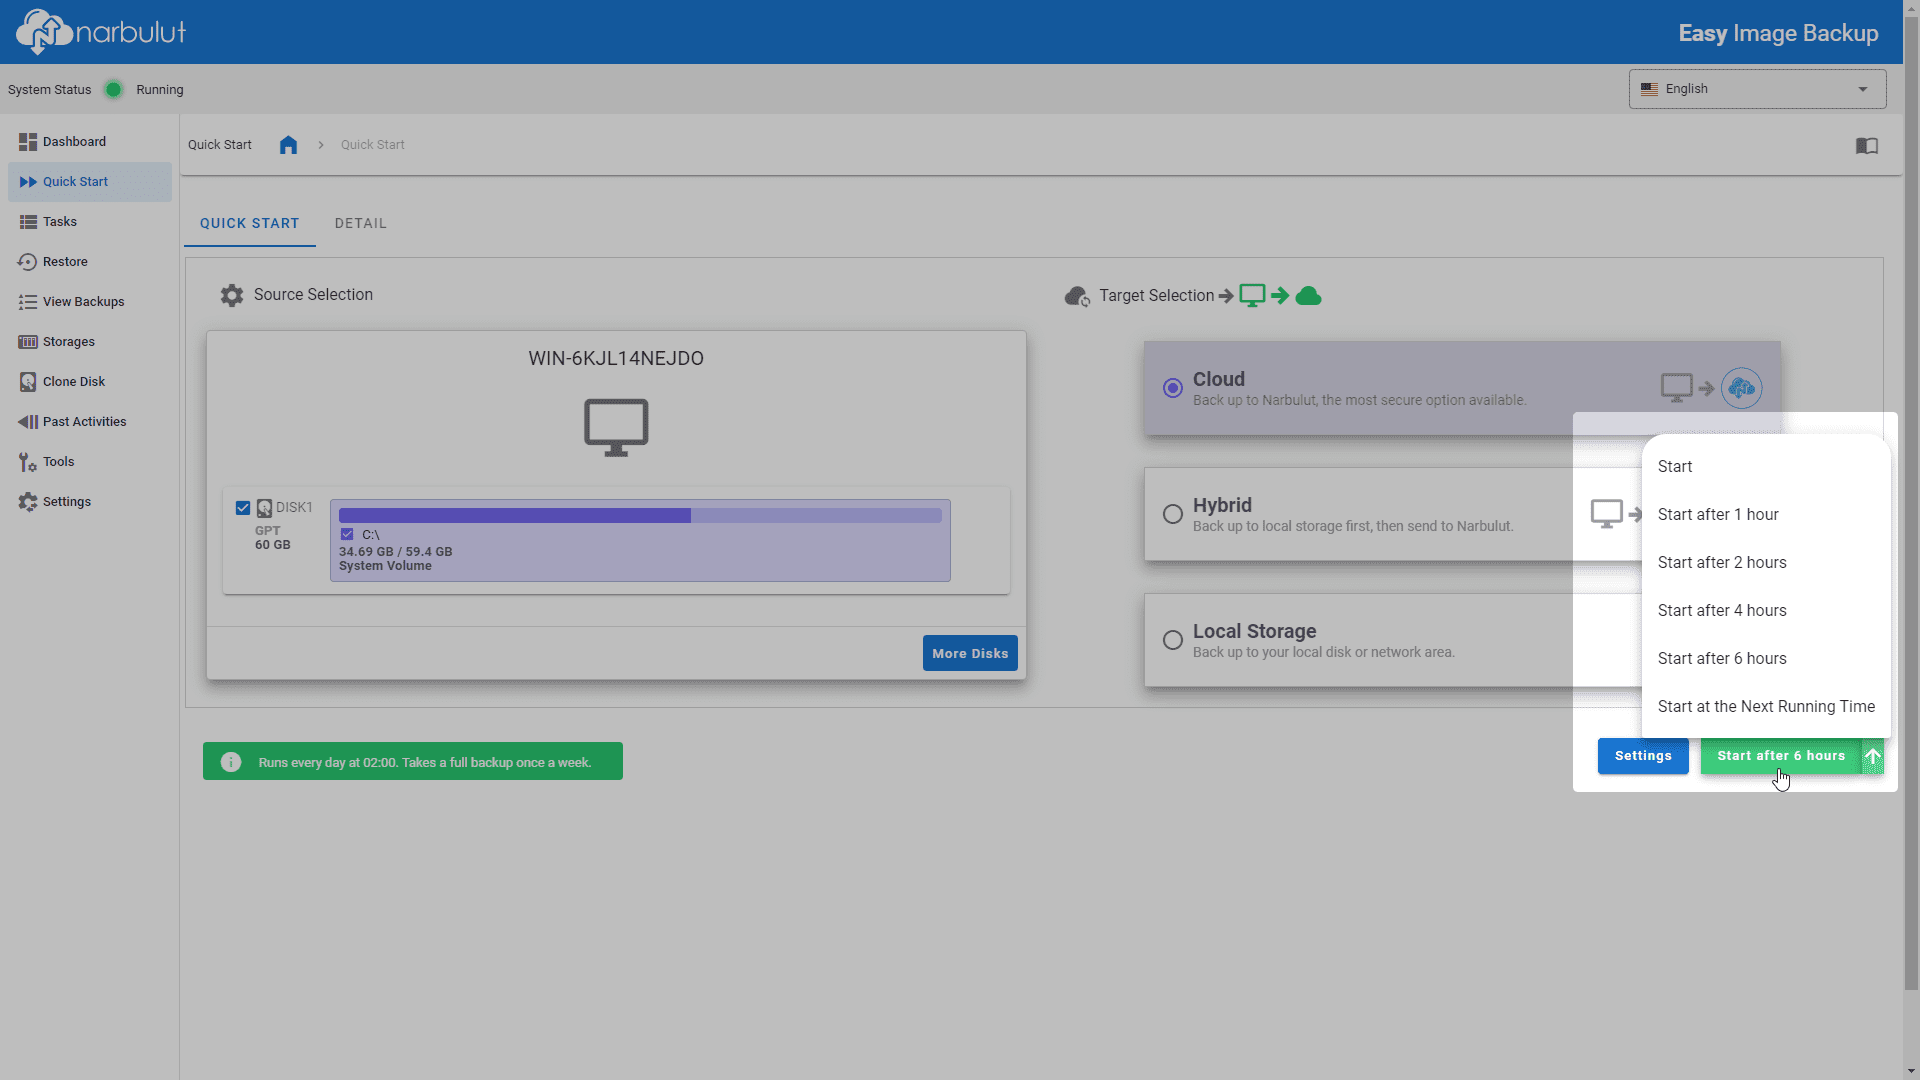
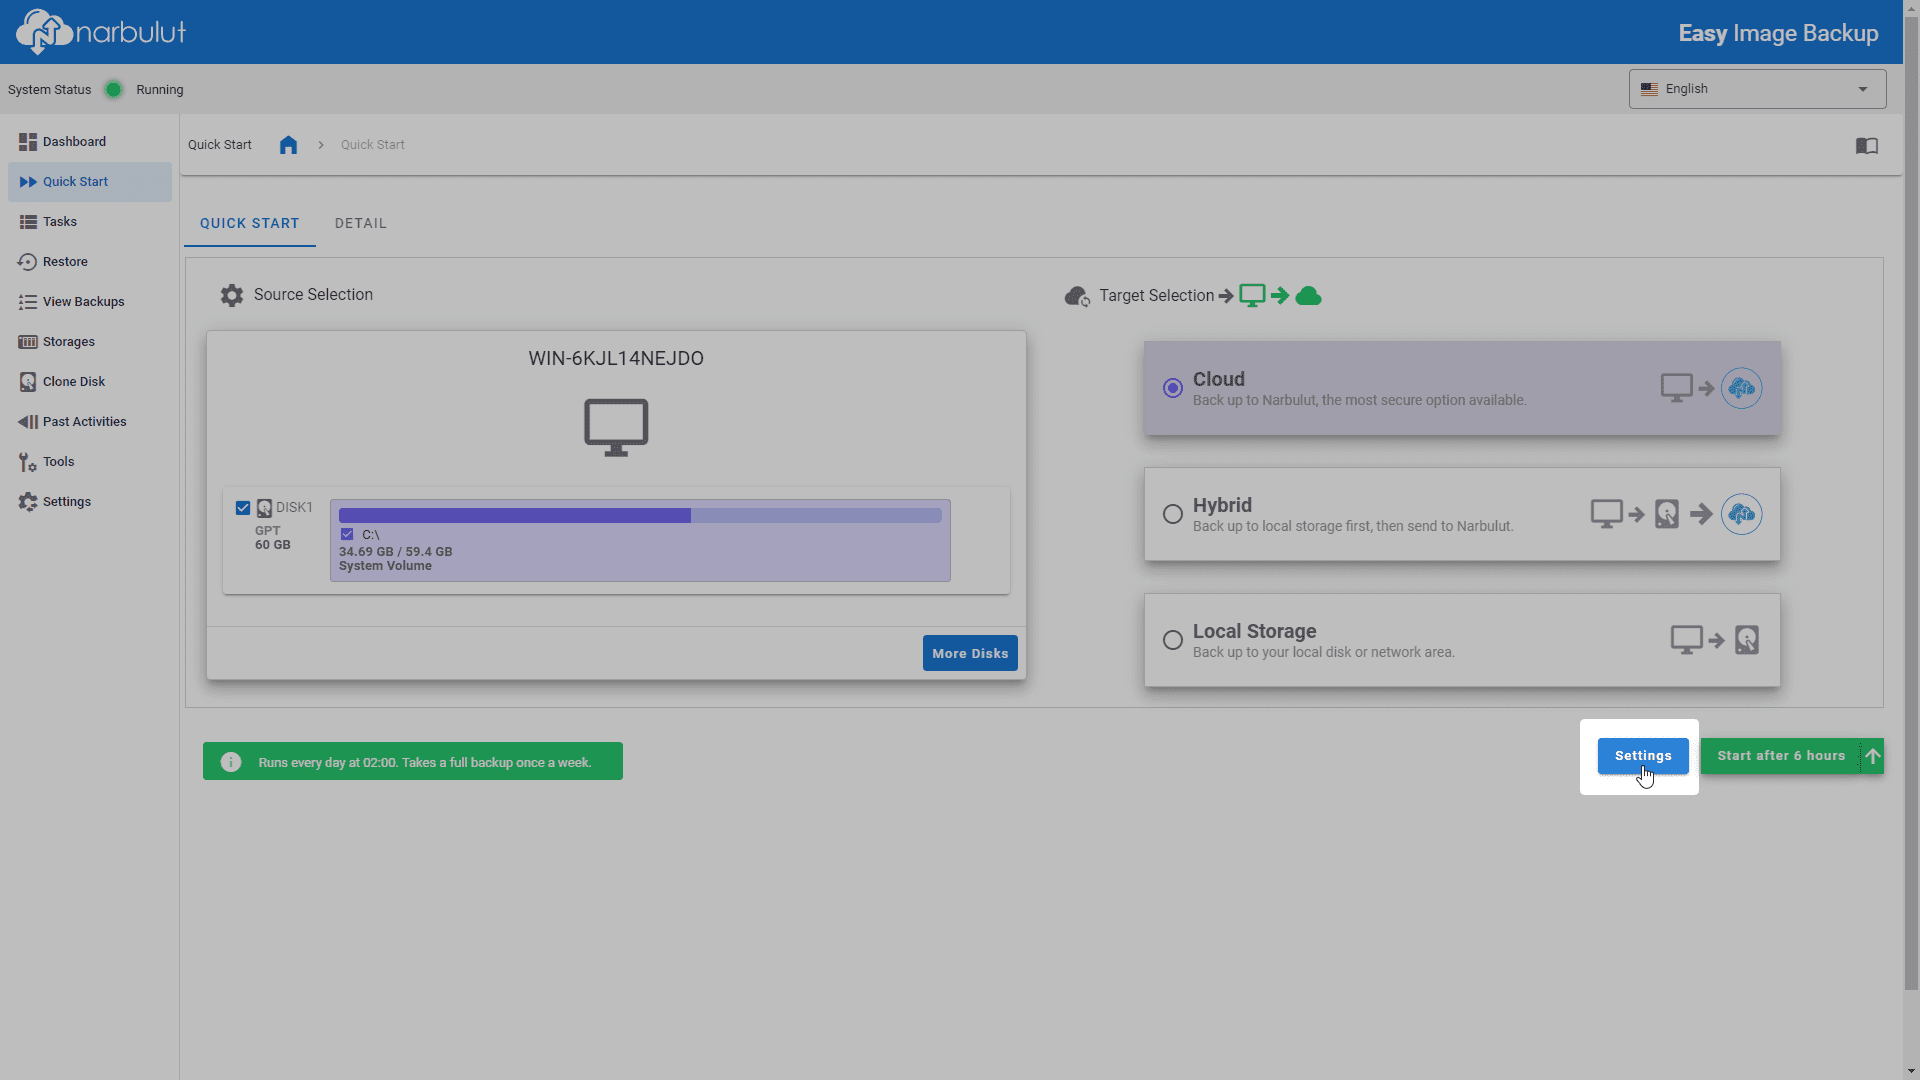
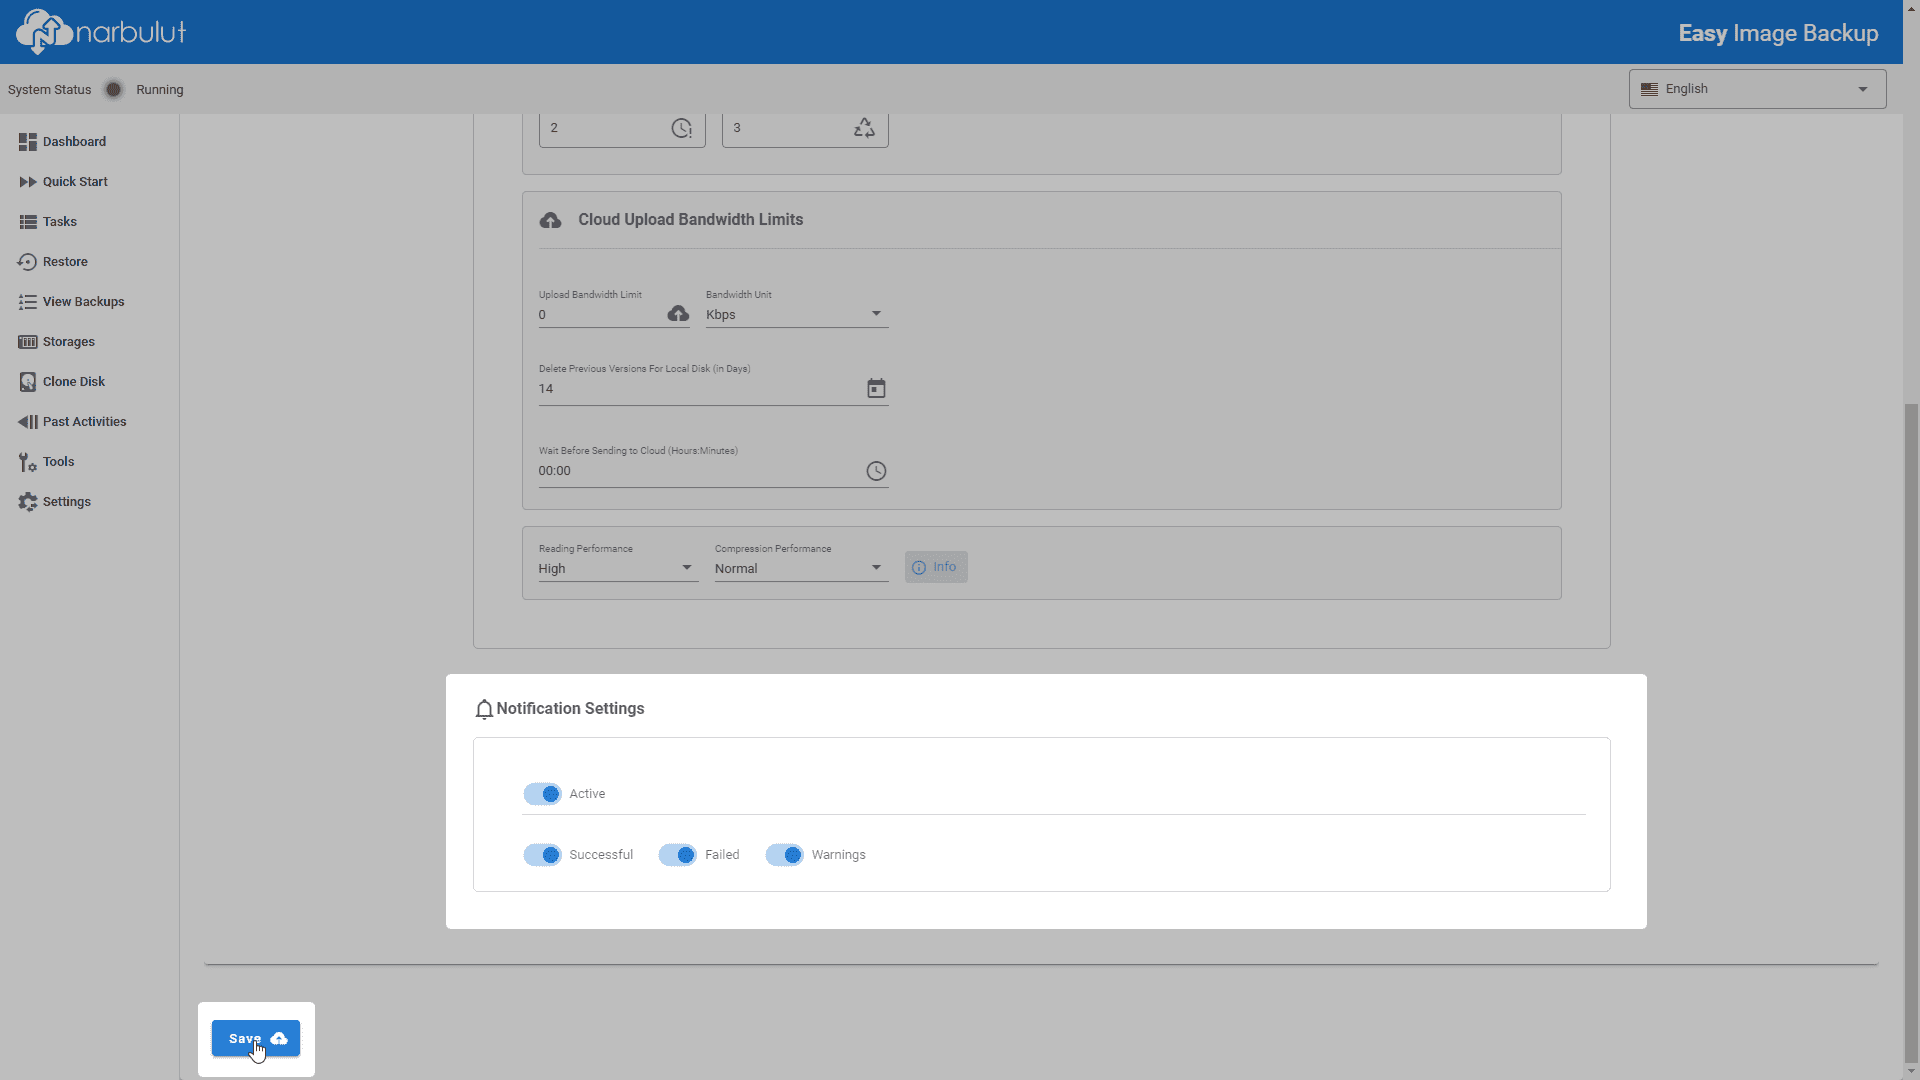
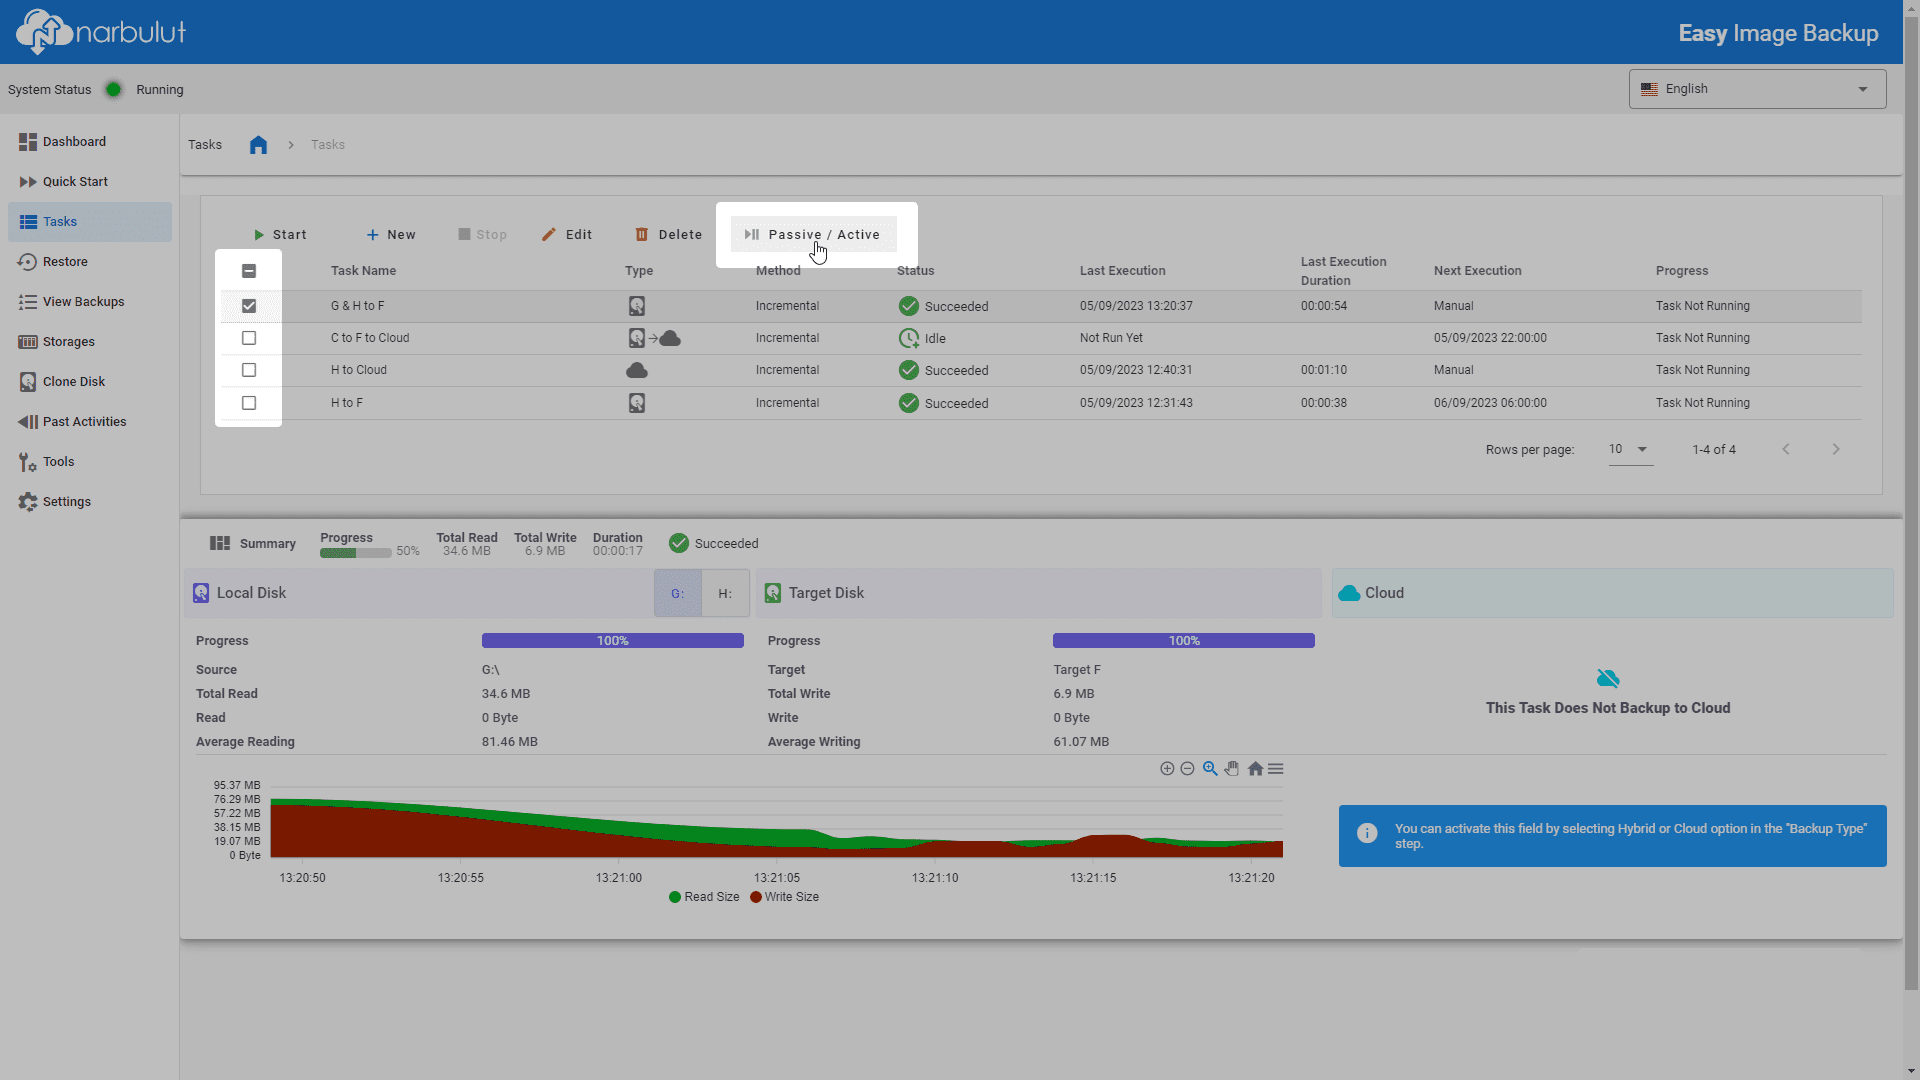
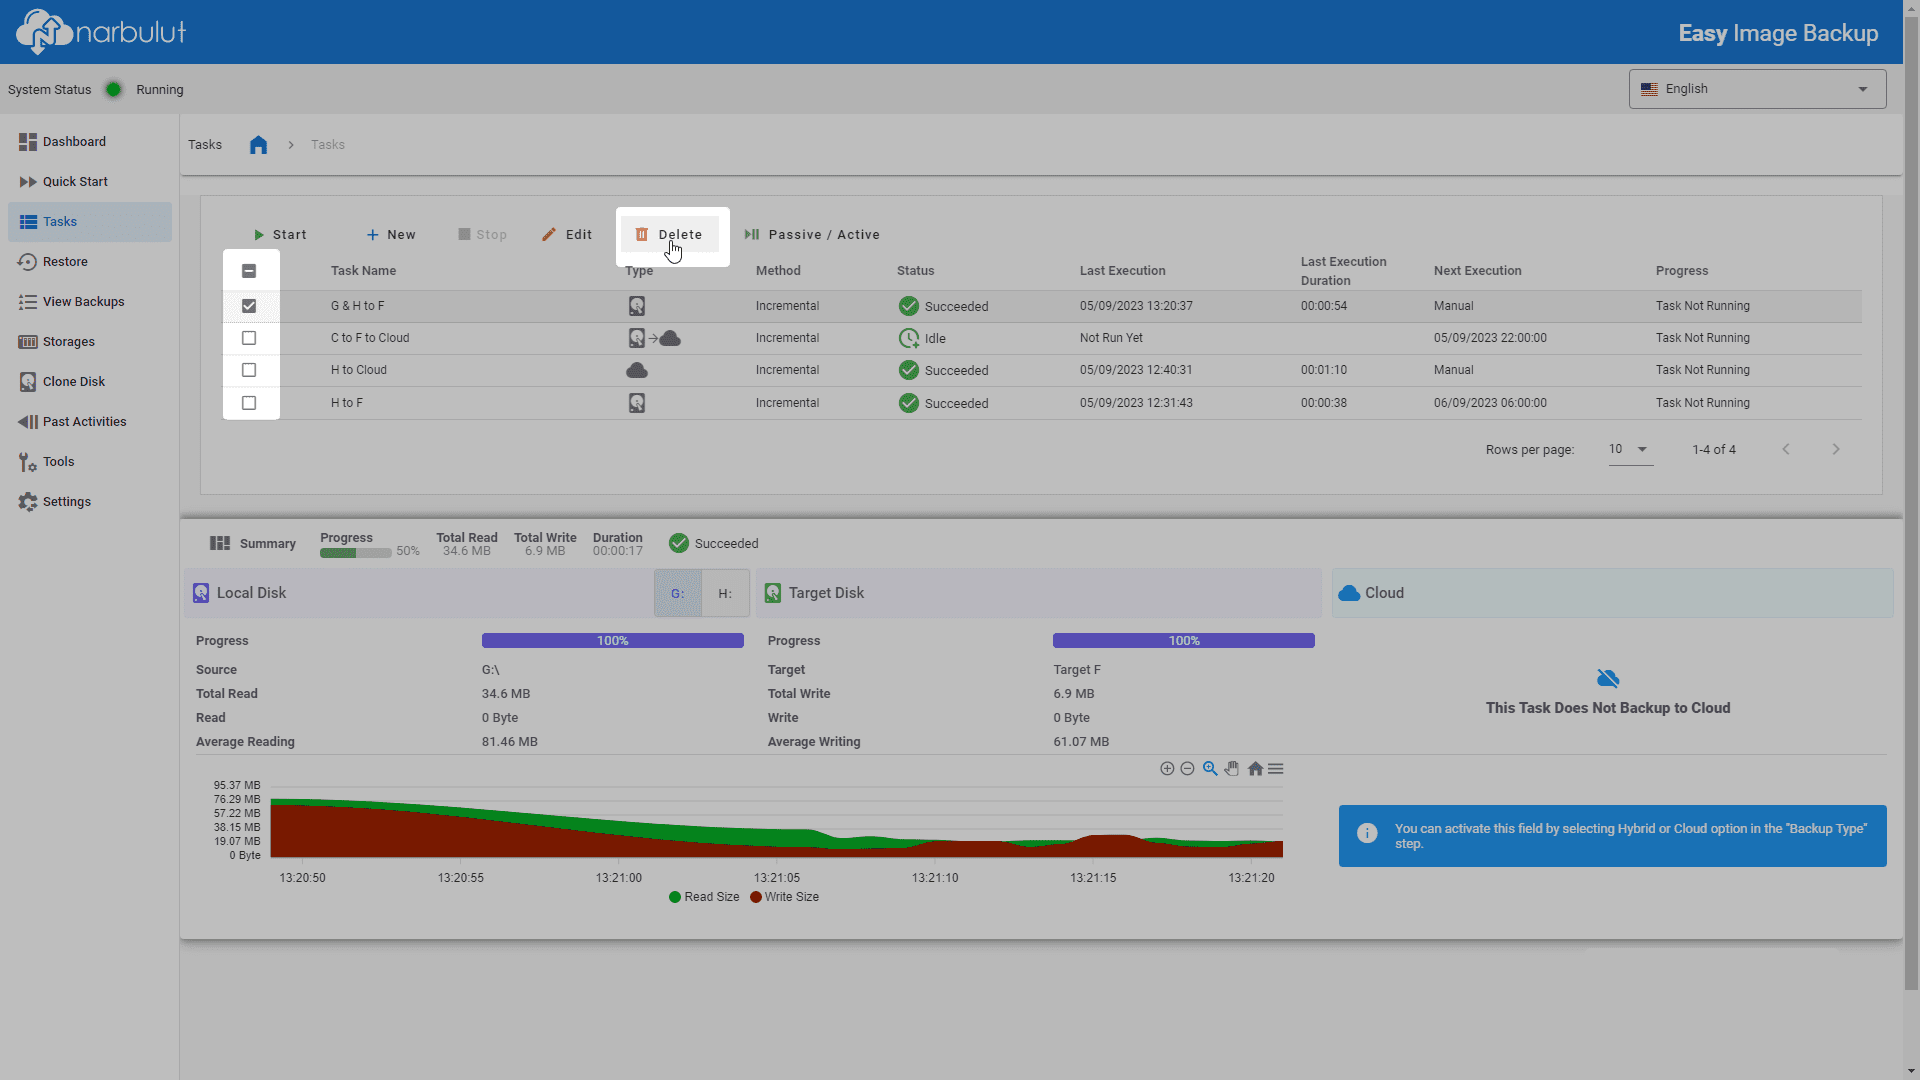
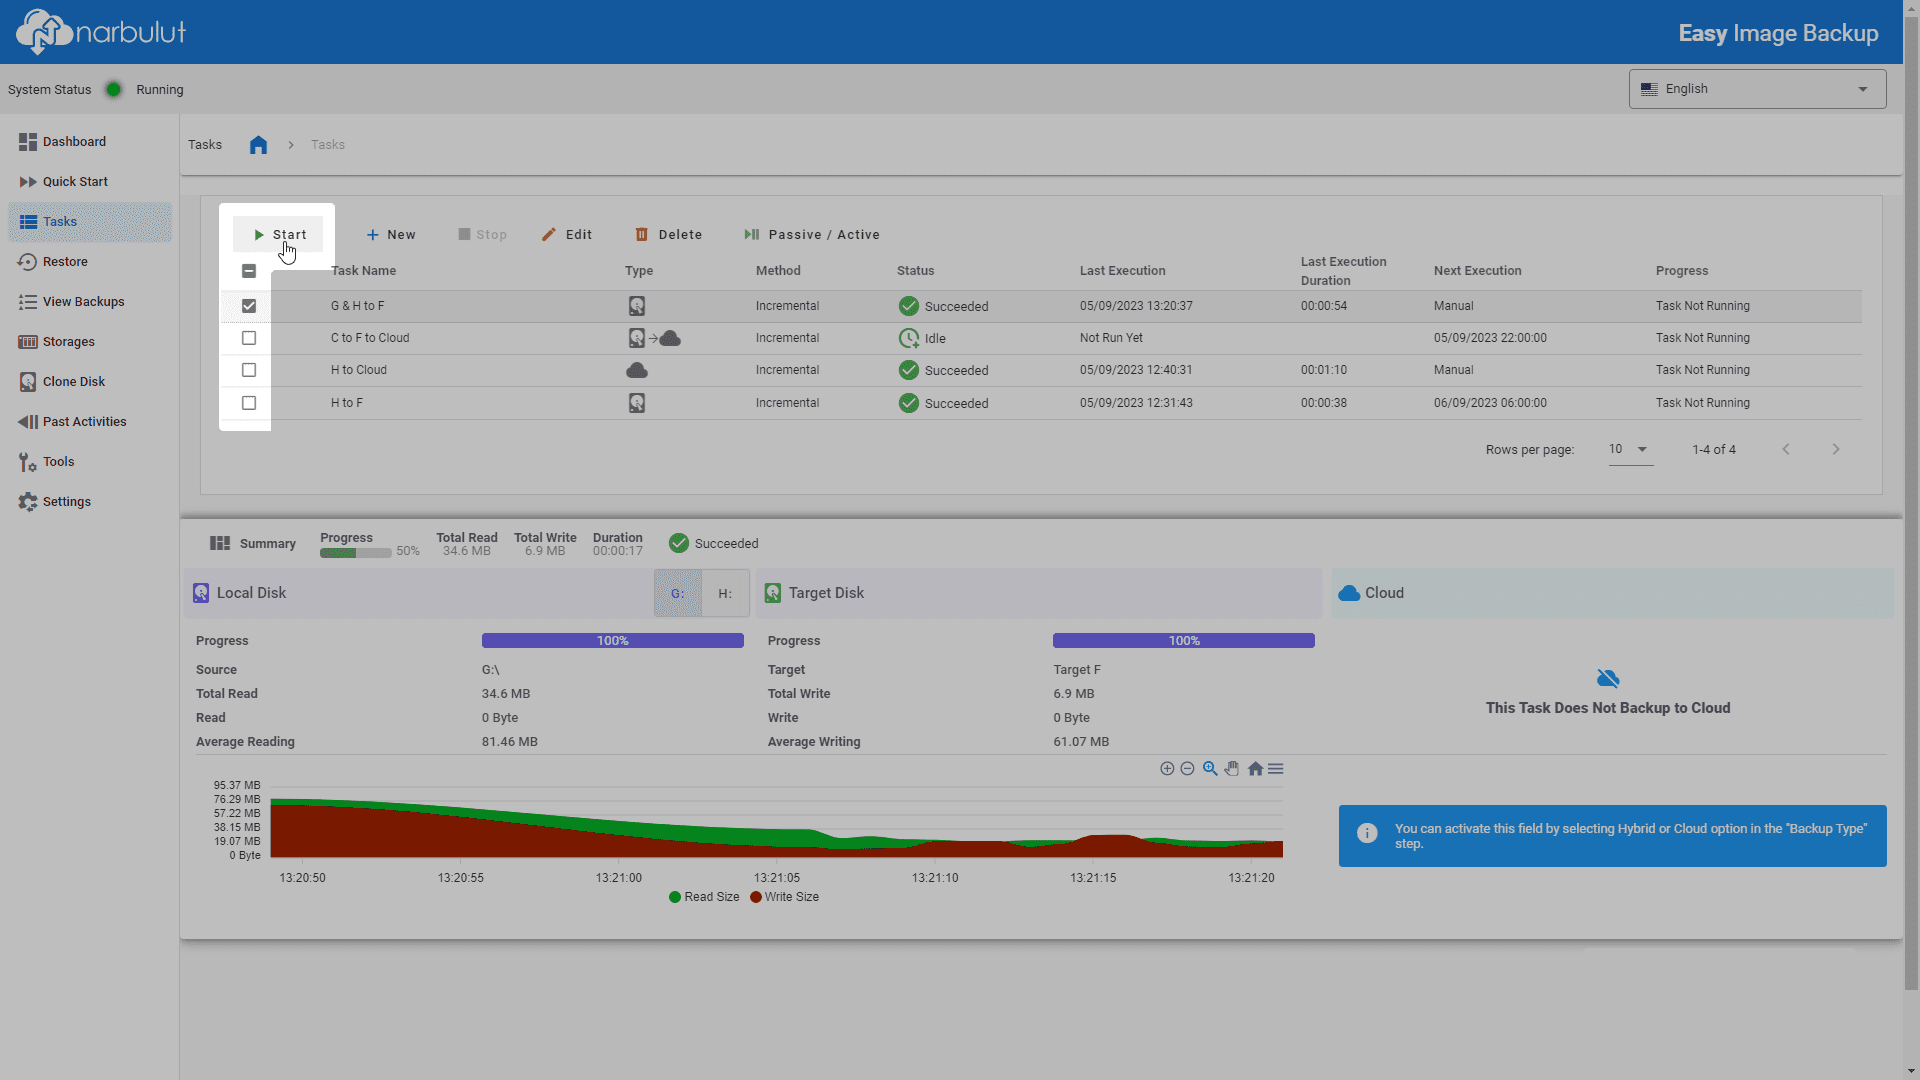
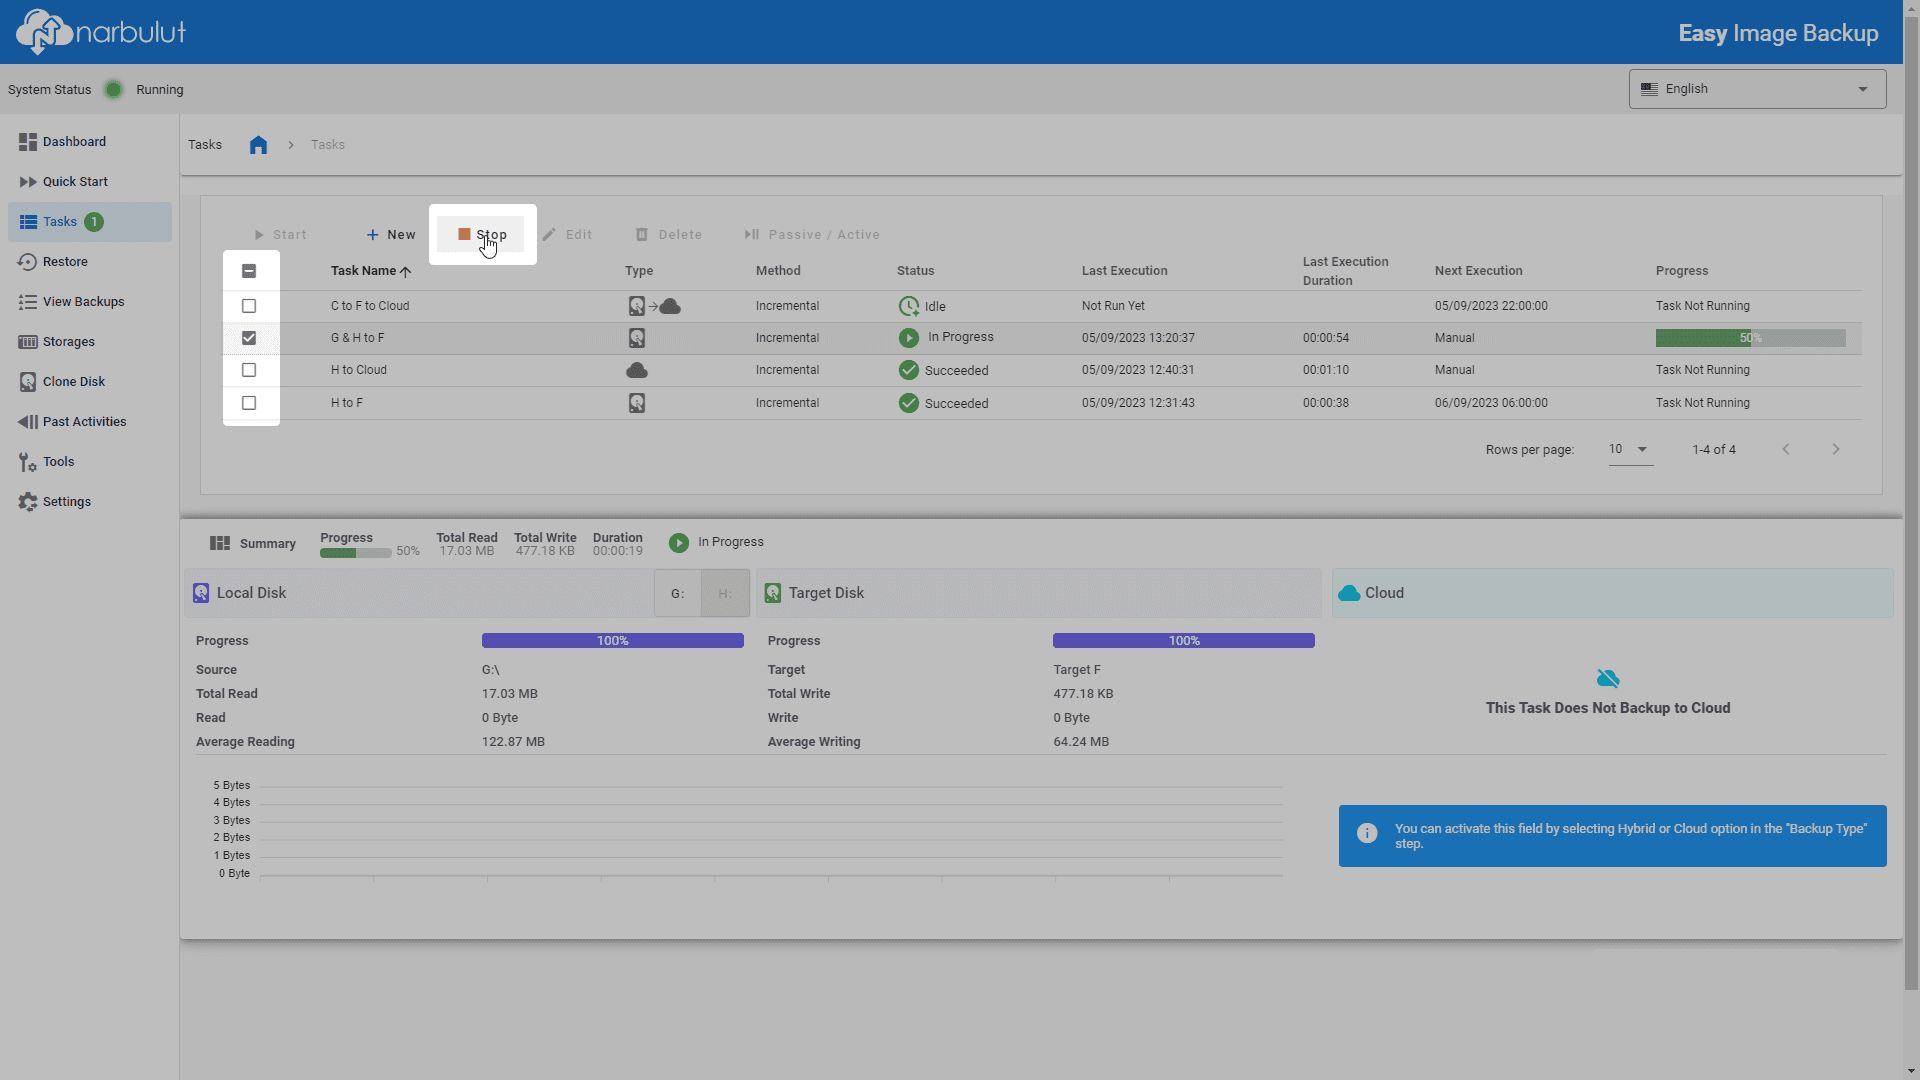
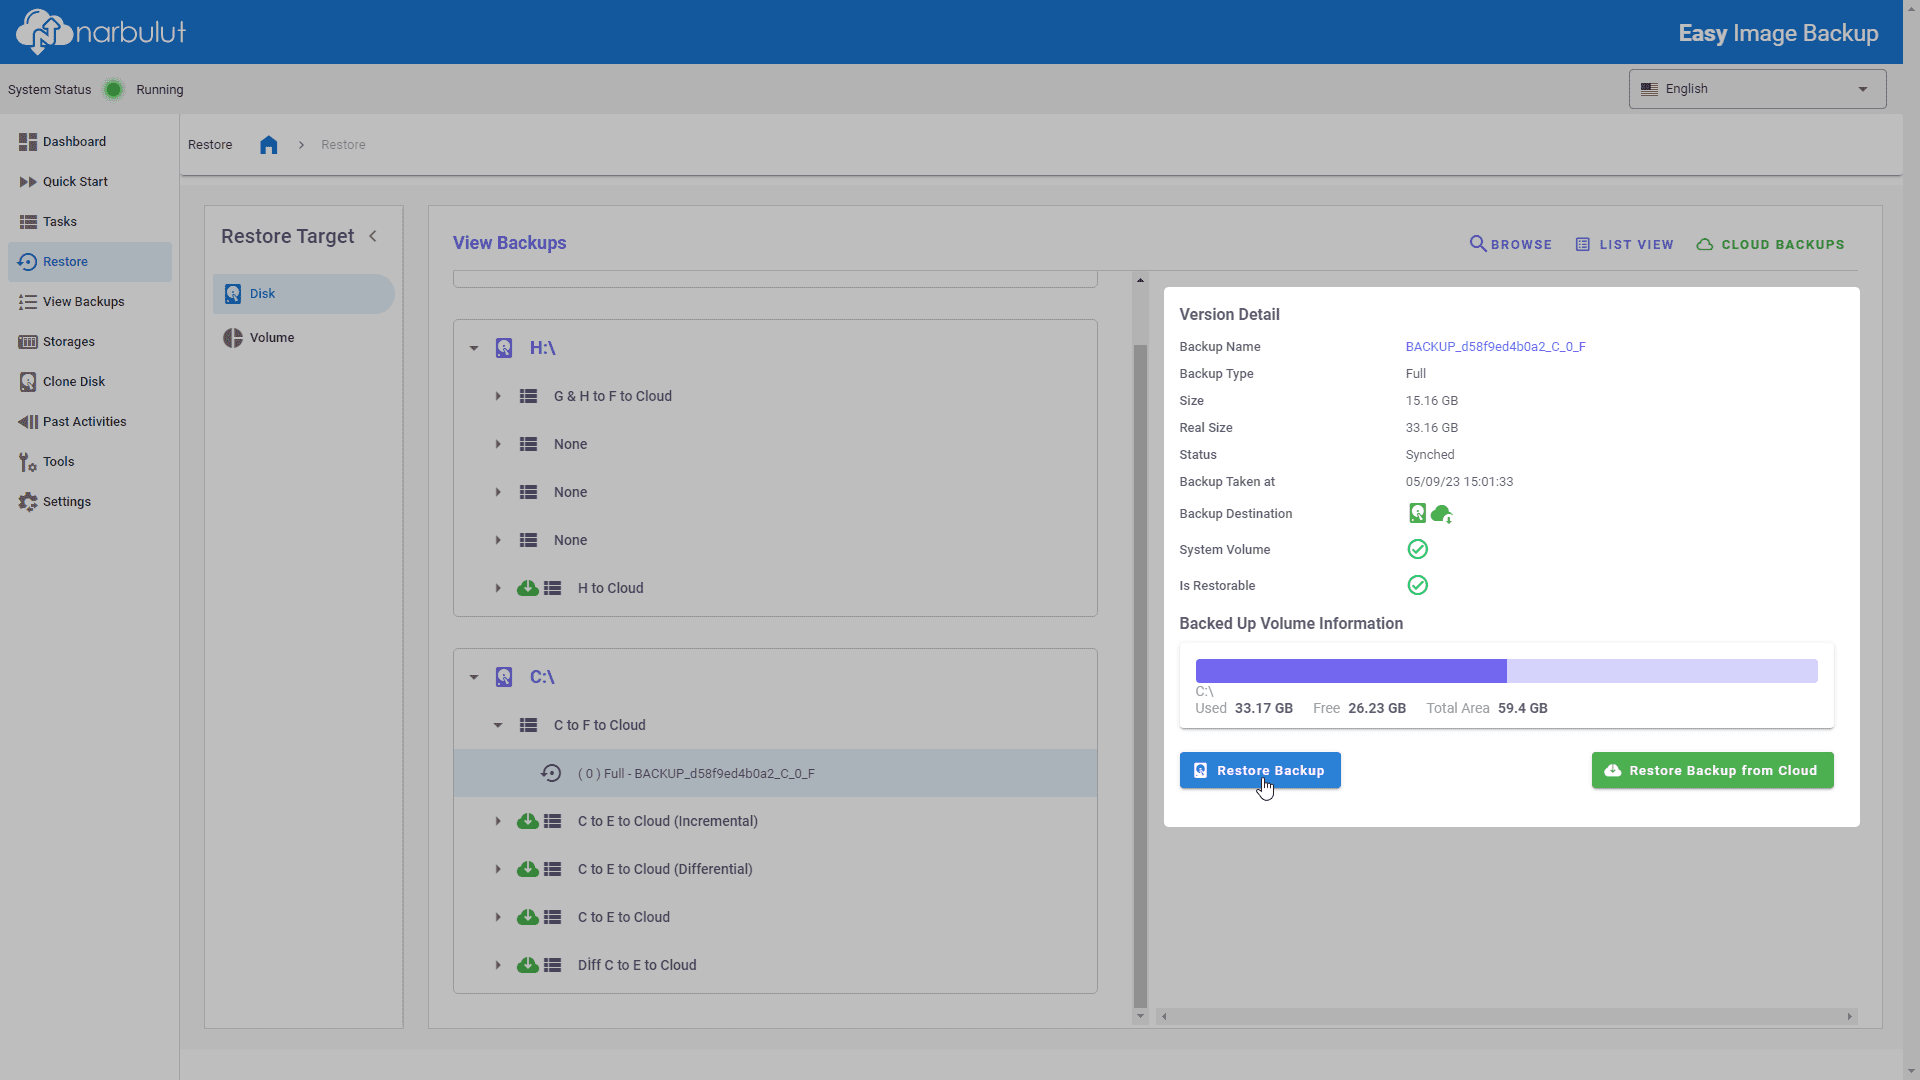
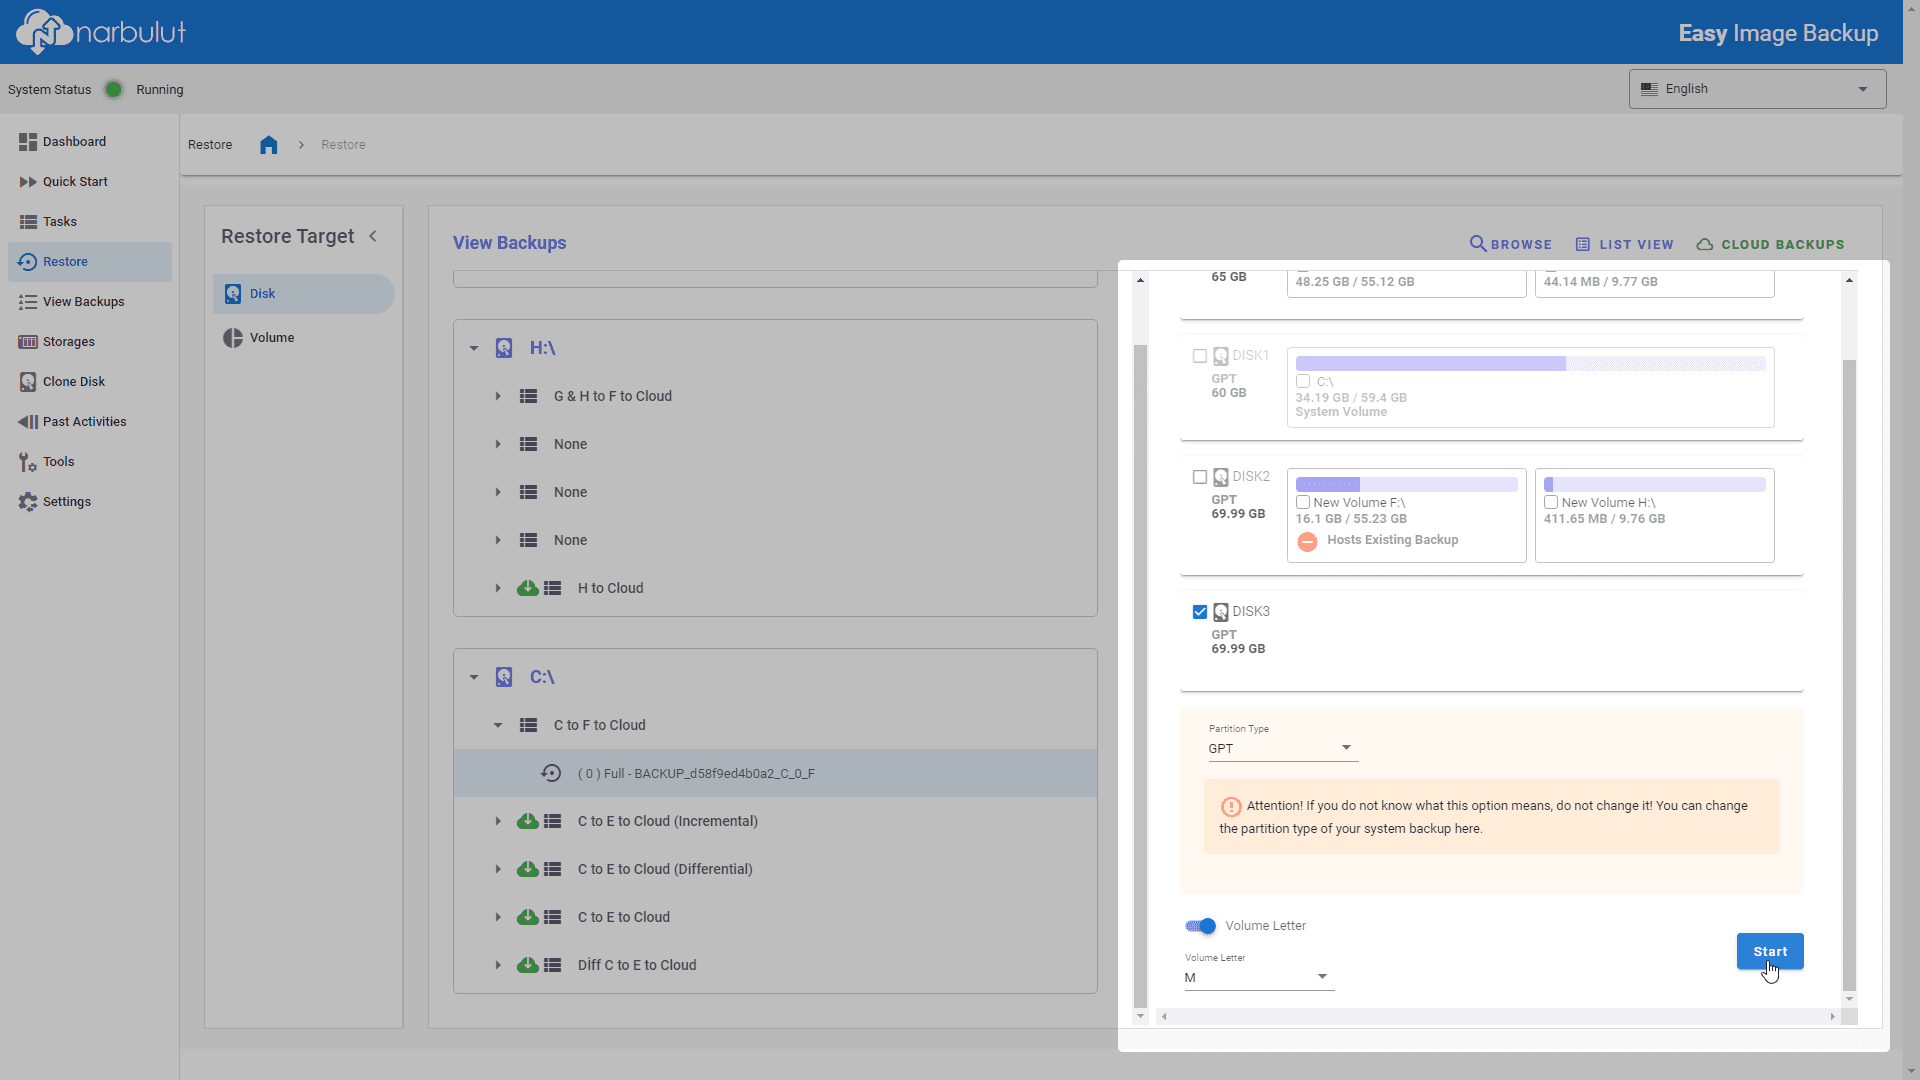
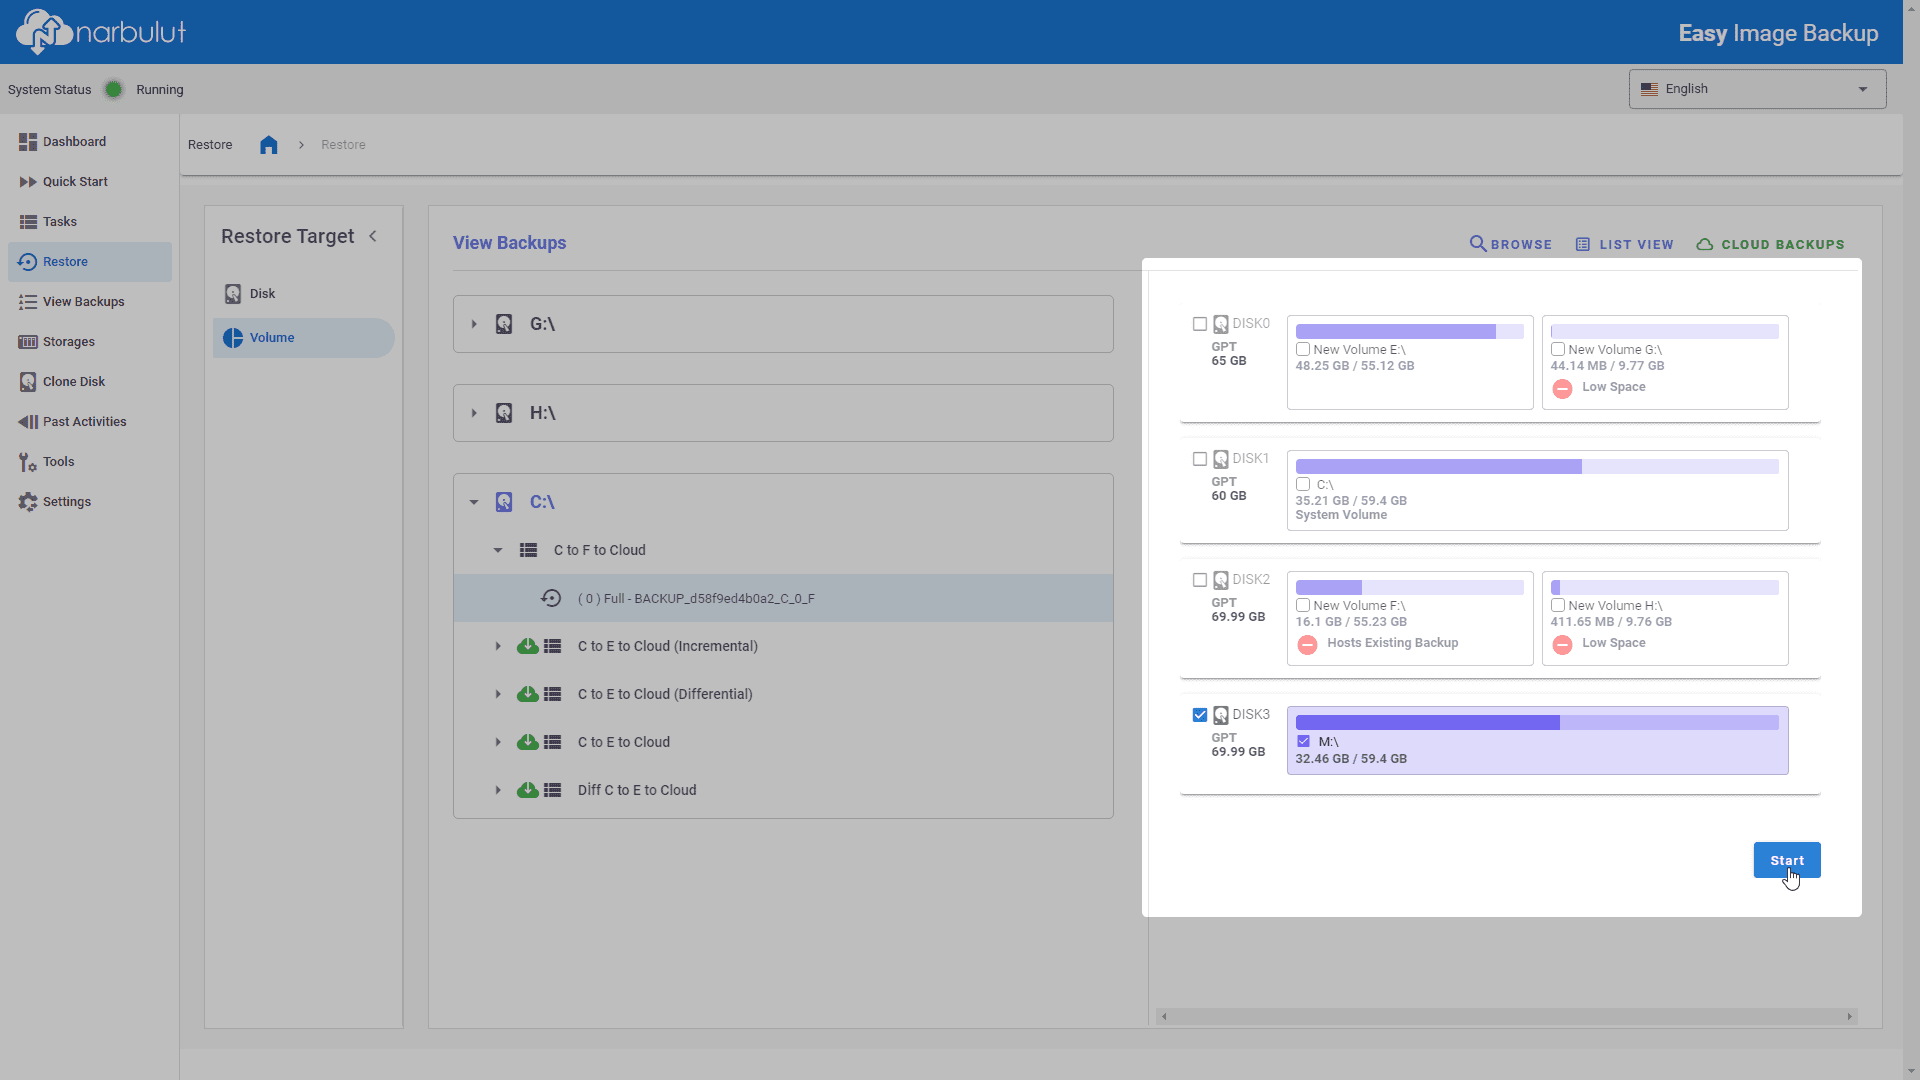
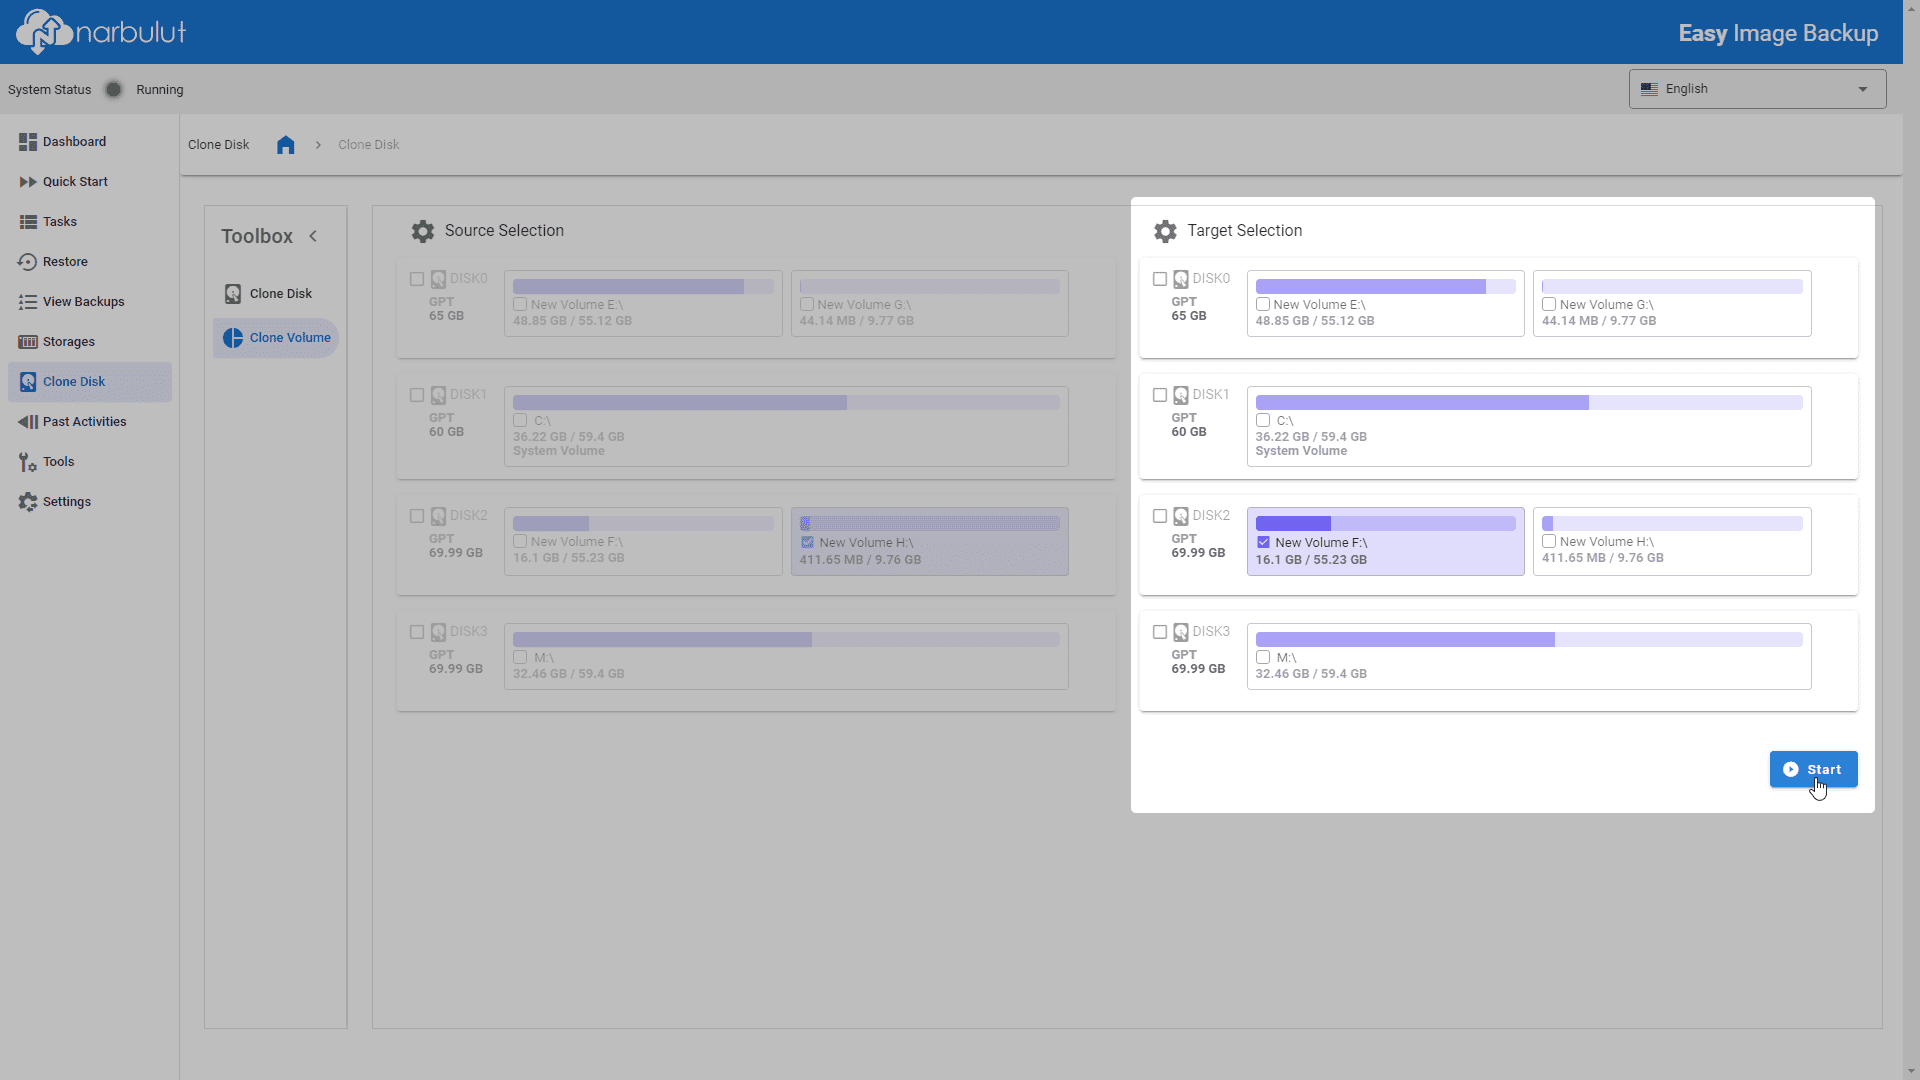
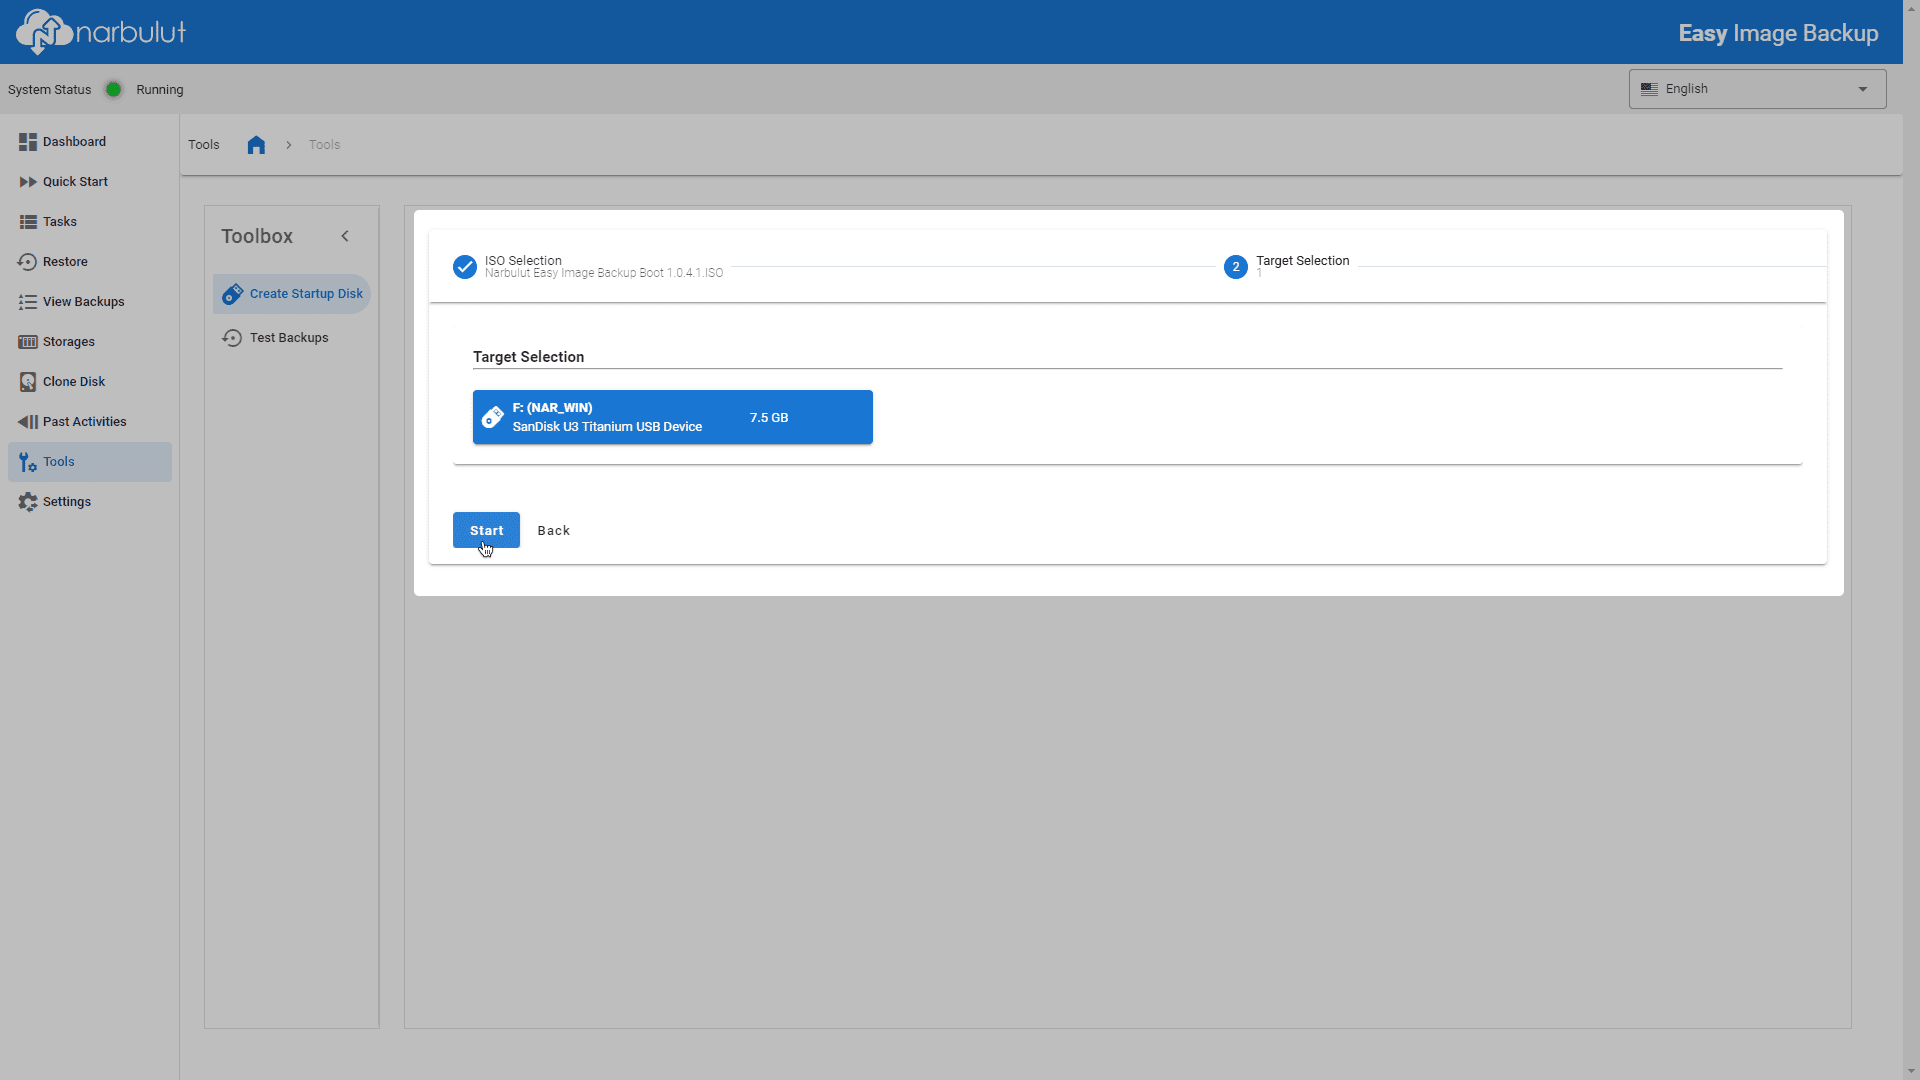
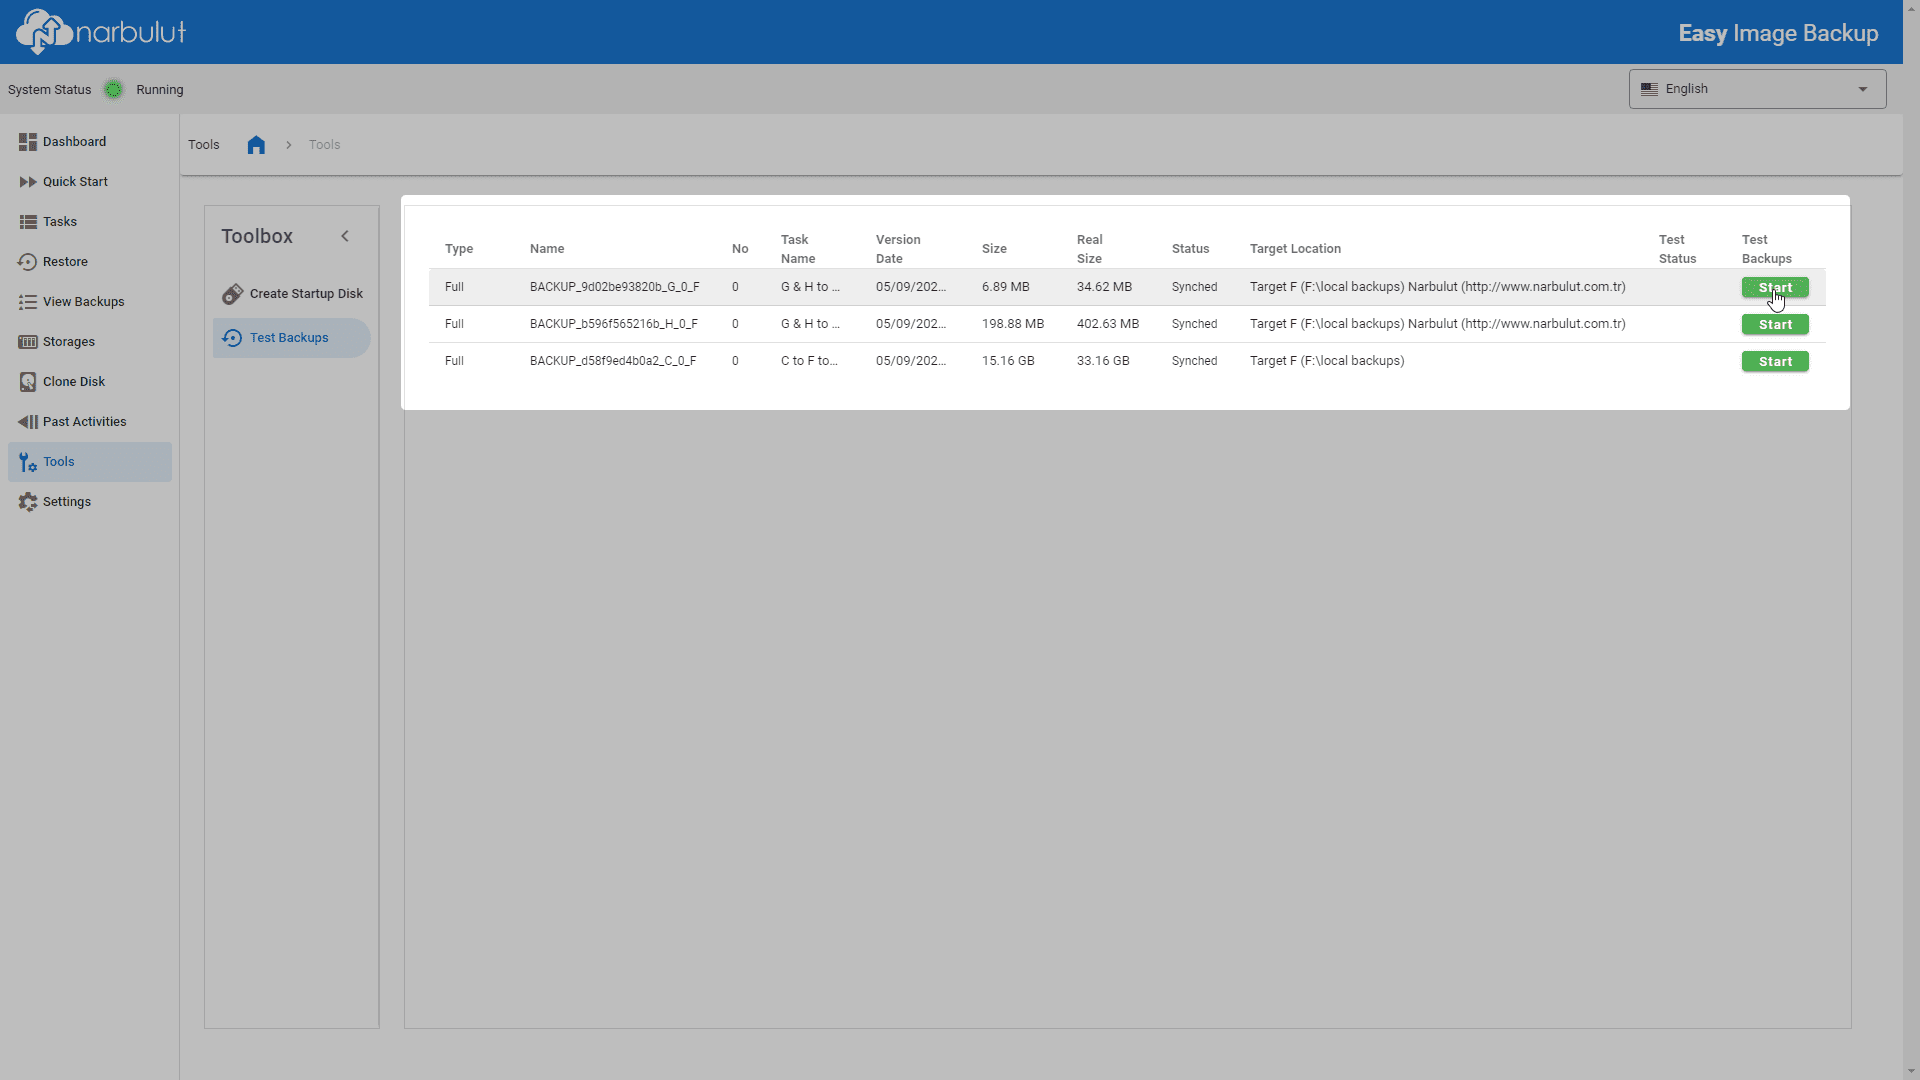
Start the task by clicking the Start button. To schedule the task for a later time, click on    icon.

Configuring Tasks with Quick Start Menu #

You can configure the backup task yourself with Settings button.

Guide #

You can click on Guide button located in the upper right corner of the menu to learn about the basic functions of the menu.

Tasks #

In this menu, you can create new backup tasks and manage existing tasks.

Creating Tasks #

To create a new task, click on +New button.

Choose the backup type.

Cloud: Backups will be stored in Narbulut data centres.

Hybrid: Backups will be stored both in Narbulut data centres and in a locally chosen area/network from Storages.

Local Storage: Backups will be stored in a locally chosen area/network from Storages.

Your selection in this step will affect the Target Disk step.

Select volumes and/or disks to be backed up.

Select target disk/disks.

The options presented in this step depend on the selections you made in the Backup Type step. (For example, if you chose the Hybrid in the backup type step, you will be required to select both cloud storage and local storage in this step.)

You can also easily create a new storage by using the + New Destination button on this screen.

Set the timing of the task.

If you enable the Auto Start option, you need to specify the task’s frequency as daily, weekly, or monthly from the opened section. If this option is not enabled, the task created will be manual.

Auto Shutdown option ensures the system shuts down when the task is successfully completed each time.

Decide the backup method.

Backup methods you can choose from are predetermined as full, incremental and differential.

Full: Takes a complete backup of the selected volumes.

Incremental: Backs up changes made to the selected volumes since the last backup.

Differential: Backs up changes made to the selected volumes since the last full backup.

Full Backup Day option, allows you to choose the day of the week when a full backup will be performed every week for incremental and differential backup types.

Storage Type and Quantity option lets you choose whether backups will be stored based on the number of backups or the number of days to keep them. Depending on your choice here, you can specify either the number of backups to retain or the number of days to retain them.

Configure advanced settings related to the task.

Local Backup Error Behaviour (for local and hybrid backup types) allows you to determine how many times the process will be retried at intervals of how many minutes in case of any errors that occur during local backup.

Cloud Backup Error Behaviour (for cloud and hybrid backup types) enables you to specify how many times the process will be retried at intervals of how many minutes in case of any errors that occur during cloud backup.

Cloud Upload Bandwidth Limits (for cloud and hybrid backup types) allows you to set a bandwidth limit for the backup process to the cloud.

Delete Previous Versions for Local Disk (in hybrid backup type) lets you determine how many backup versions will be stored on the disk.

Wait Before Sending to the Cloud (in hybrid backup type) allows you to specify the waiting time between taking the backup to the local disk and starting the backup to the cloud.

Read/Compression Performance enables you to configure the resource usage (CPU, etc.) of the Narbulut Easy Image Backup application.

Configure notification settings. You can complete the task creation process clicking the Save button.

Managing Tasks #

Through this menu, you can edit, deactivate/activate, and delete tasks that you previously created. You can manually start tasks and stop running tasks whenever you want. You can also view real-time statistics for running tasks and the last run status of tasks that have run at least once.

To view the statistics of tasks, select the task.

If multiple volumes are being backed up in the selected task, click on the respective letter to view statistics on a volume-by-volume basis.

To edit a task, select the task and click on the Edit button.

To change the status of tasks between passive and active, select the tasks and click on the Passive/Active button.

To delete tasks, select the tasks and click on the Delete button.

To manually start tasks, select the tasks and click on the Start button.

To stop running tasks, select the tasks and click on the Stop button.

Restore #

You can use this menu to restore your backups.

Select the backup you want to restore based on the task name.

Task names None refer to backups that are located in subfolders of the created storages and have not been taken in the active setup. The created storages are automatically scanned for possible backups shortly after their creation.

Version Detail section contains information about the selected backup.

Backed Up Volume Information section provides information about status of the volume at the time of the backup.

Cloud Backups button makes the backups stored in the cloud in previous setups visible/invisible in the backup list. These backups are indicated with a cloud icon.

Browse button enables you to restore backups that were not taken in the active setup by specifying their directory paths.

Disk #

With this menu, you can restore your backups to a disk target.

Select the restore target as disk.

Depending on the type of backup you have chosen, select either Restore Backup or Restore Backup from Cloud option.

Restore Backup option allows restoration using backup files located in one of the previously defined storages.

Restore Backup from Cloud option enables restoration using backup files located in Narbulut data centres.

Both options are active when using the hybrid backup type.

Choose the Target Disk to restore to.

You can determine the volume letter for the selected disk using the Volume Letter option. If you do not select anything here, the volume letter will be determined automatically.

If the backup you have selected is a system volume backup, you can specify the partition type of the disk to be restored as either GPT or MBR.

If you are not familiar with the concepts mentioned in the Partition Type section, it is recommended that you do not change this option from the default. By default, Narbulut selects the original partition type of the disk from which the backup was taken.

If the restoration target is selected as disk, the backup to be restored will be overwritten the selected disk. The remaining space on the disk is designated as unallocated space.

Start the restoration process.

You can view the status of the restoration process by selecting the backup from the same menu. You can also cancel the operation using the Cancel button.

Volume #

With this menu, you can restore your backups to a volume target.

Select the restore target as volume.

Choose either Restore Backup or Restore Backup from Cloud option based on the type of backup you have selected.

Restore Backup option allows restoration using backup files located in one of the previously defined storages.

Restore Backup from Cloud option enables restoration using backup files located in Narbulut data centres.

Both options are active when using the hybrid backup type.

Select the target volume to restore to.

If the restoration target is selected as volume, the backup to be restored will be overwritten the selected volume. The remaining space on the volume is designated as unallocated space.

Start the restoration process.

You can view the status of the restore operation by selecting the backup from the same menu. You can cancel the operation by using the Cancel button.

View Backups #

In this menu, you can view your backups and download your backups from the cloud.

Filtering Backups #

Filtering options on the left bar can assist you in finding the backups you are looking for.

View Backups menu includes important information about the backups, such as which task they are associated with, creation dates, version dates, sizes, actual sizes, and statuses.

Download Backups #

Click on the cloud icon in the Target Location column of the backup you want to download.

Show the path of the destination folder by using browse button and start the backup download process.

  • You can view the status of the download process from the same column. You can cancel the operation using the Cancel button.
Storages #

In this menu, you can create storages where your backups will be stored and manage existing storages. Any local volume, locations on the local network, and NAS devices can be converted into a storage.

Add New Destination #

To add a new storage space, use the + New Destination button.

After entering the required information, finalize the process by clicking the Verify and Save button.

If the storage you want to add requires credentials for access, check the Password Protected box and enter the necessary information in the related fields.

When you check the Password Protected box, you need to enter the domain name of the network area to be connected, as well as the account name and password to be used for the connection.

Managing Storages #

To delete desired storages, select the storages and click on Delete button.

Storages that are being used as target disk by backup tasks cannot be deleted.

Users with a cloud storage license have Narbulut Storage included by default among the Storages. This storage cannot be deleted.

Clone Disk #

In this menu, you can perform disk and volume cloning operations.

Clone Disk #

Choose the Clone Disk tool from toolbox.

From the Source Selection, select the disk to be cloned.

From the Target Selection, choose the target disk for the cloning operation. You can start the cloning process with the Start You can monitor the progress of the operation using the progress bar displayed in the same menu.

Disk cloning process overwrites the target disk with the source disk. Any remaining space on the disk is designated as unallocated space.

Clone Volume #

Choose the Clone Volume tool from toolbox.

From the Source Selection, select the volume to be cloned.

From the Target Selection, choose the target volume for the cloning operation. You can start the cloning process with the Start You can monitor the progress of the operation using the progress bar displayed in the same menu.

Volume cloning process overwrites the target volume with the source volume. Any remaining space on the volume is designated as unallocated space.

Past Activities #

In this menu, you can find information about past backup tasks, restores, and disk/volume cloning operations. You can switch between menus using the Filter tab.

You can click on the checkboxes next to the tasks to access their last running statistics.

Tools #

This menu contains useful tools to help you create a startup disk and test your backups. You can switch between tools using the toolbox.

Create Startup Disk #

In this menu, you can turn your USB drive into a bootable startup disk using a source ISO file.

  • Select the ISO file.

Select the target USB drive and start the process. You can monitor the progress of the startup disk creation process using the displayed progress bar.

Test backups #

In this menu, you can test whether or not the backups taken to local storages/network areas are restorable.

Click on Start button for the backup you want to test. You can then monitor the test status from the displayed progress bar.

Test Backups tool only checks if the backup chain is intact. This tool does not guarantee the backup’s health.

Settings #

In this menu, you can find data such as user and license information, quota usage details, and agent version information. You can also perform actions like logging out and changing your password. Additionally, using this menu, you can limit the bandwidth the agent uses during download and upload processes.

Log Out/Change Password #

You can click on the profile icon to perform logout and password change operations.

Bandwidth Limitation #

You can limit the bandwidth the agent uses during relevant processes by adjusting the Download Bandwidth Limit and Upload Bandwidth Limit sections. Save your changes by clicking on the Save button.

Bandwidth limits you set using this menu will affect the agent as a whole and apply to tasks without bandwidth limits defined.

If a task has its own defined bandwidth limit, it will not be affected by this restriction.

Connection Test #

You can test both agent’s connection with Internet and with Narbulut Cloud clicking on this button.

These are the main operations you can use the Narbulut Easy Image Backup agent for. You can also look into other guides we published for further information about Narbulut products.

Copyright ©2017 – 2024 Narbulut. All Rights Reserved.

Narbulut Bilgi Teknolojileri A.Ş.

Bize Ulaşın

Merkez : Deposite İş ve Outlet Merkezi, A1 Blok No: 325A 34490 İkitelli, Başakşehir / İstanbul
Şube : Yıldız Teknik Üniversitesi, İkitelli Teknopark, 1. Blok No: 1B23 İkitelli, Başakşehir / İstanbul
+90 850 545 4444
info@narbulut.com

Bizi Takip Edin

image
Copyright ©2017 – 2024 Narbulut

Narbulut Bilgi Teknolojileri A.Ş.

Contact Us

Address : Deposite Business and Outlet Center, A1 Block No: 325A 34490 İkitelli, Başakşehir / Istanbul
Branch : Yildiz Technical University, Ikitelli Teknopark, 1. Block No: 1B23 Ikitelli, Basaksehir / Istanbul
+90 850 545 4444
info@narbulut.com

Follow Us

image
Copyright ©2017 – 2024 Narbulut
Bilgilendirme

Silinmiş Öğeler

Silinen öğeler kotaya yansıtılmaz. Silinen öğeler 60 gün boyunca saklanır, sonrasında imha edilir.

Bilgilendirme

Otomatik Yedekleme

Yedeklenecek öğenin ilk olarak tam yedeği alınır. Sonrasında sadece fark yedeği alınır. Yedekleme işlemi siz çalışmanıza devam ederken arka planda gerçekleşir. Uygulama veya dosyalarınızı kapatmanız gerekmez.

Bilgilendirme

Sınırsız Versiyonlama

Versiyonlar kotaya yansıtılmaz. 1 ay içerisinde SINIRSIZ VERSİYON tutulur. Geriye dönük 11 ay boyunca her ayın son versiyonu ve bir önceki yılın son versiyonu saklanır.

Hi!
1
How can we help you?