To create a new VM, click the blue "New" button. A 4-step wizard will open: Resources → Configuration → Basics → Confirm
3. Step 1: Resources
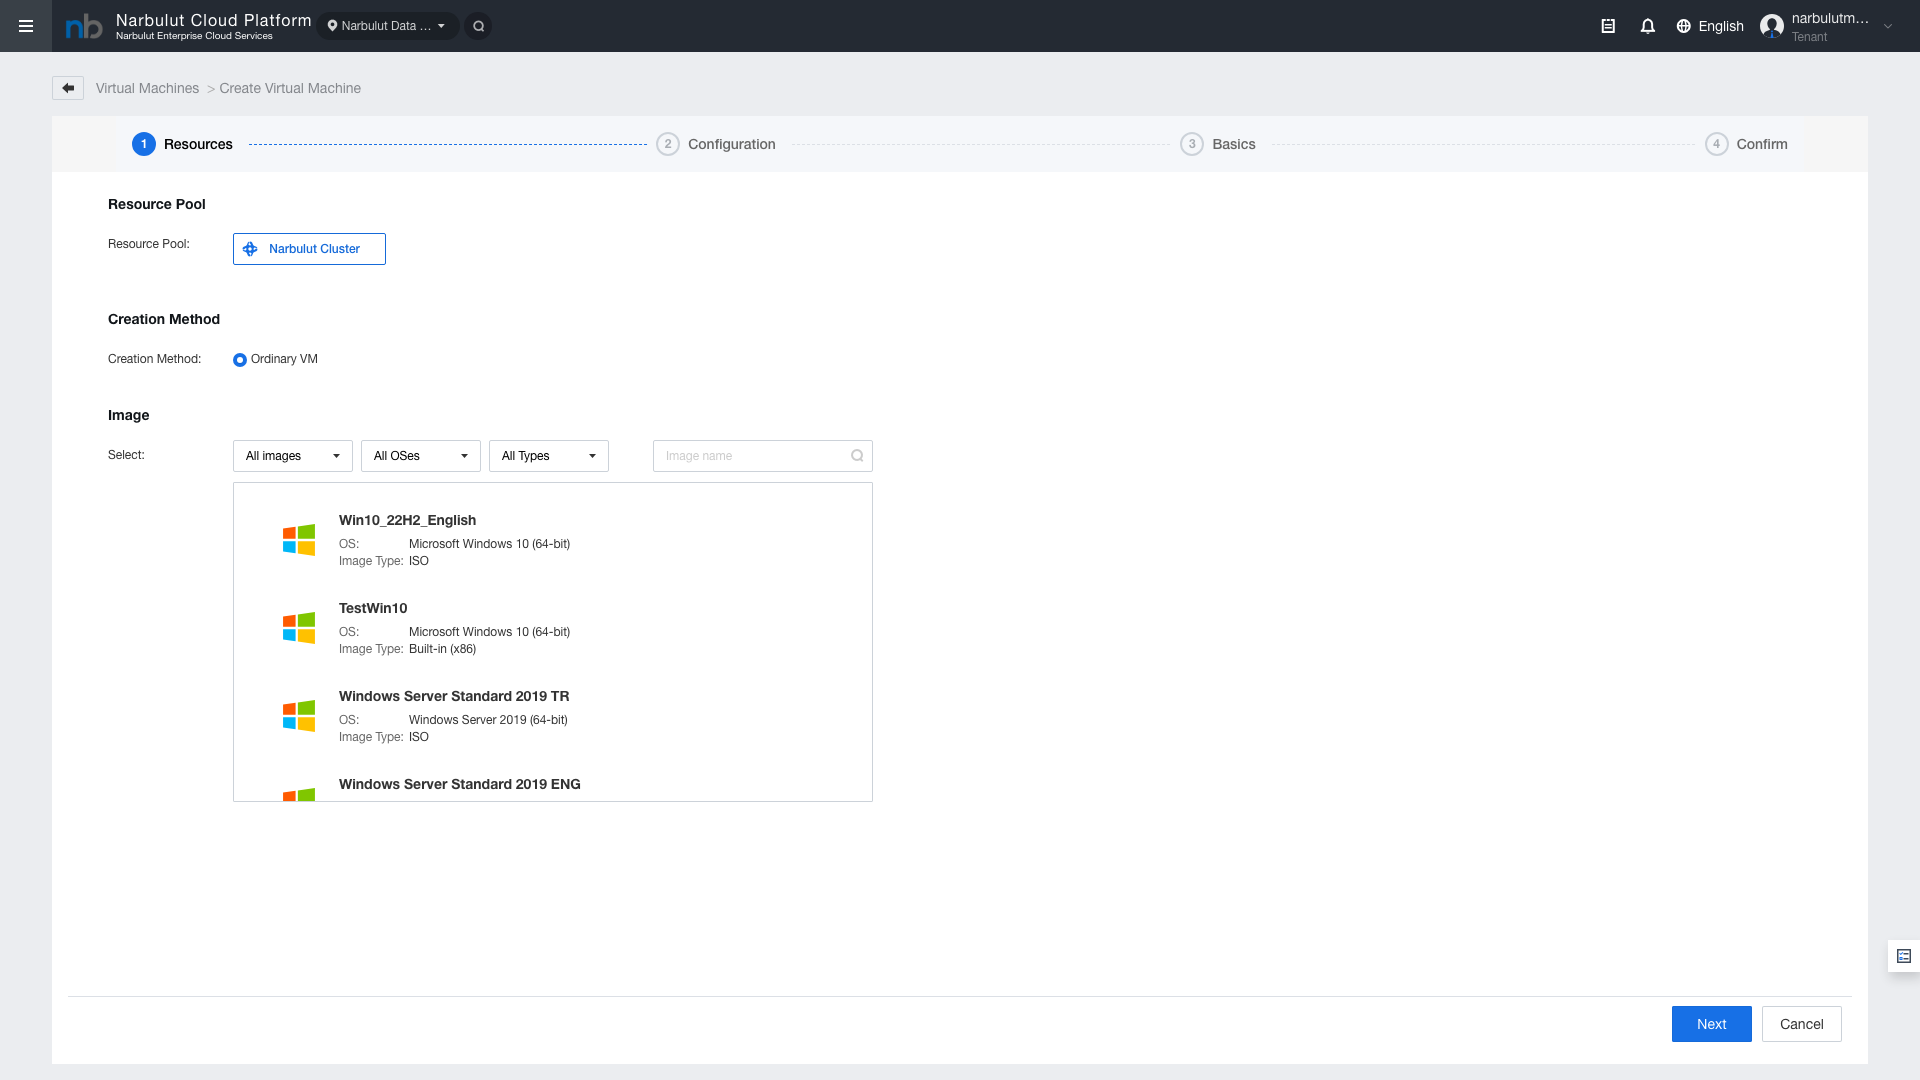
When you click the “New” button, a 4-step creation wizard opens.
Figure 2 — Step 1: Resources (Resource Selection)
Resource Pool
Select the cluster where the virtual machine will be created. Default: Narbulut Cluster
Creation Method
Choose the VM creation method. Default: Ordinary VM (standard virtual machine).
Image Selection
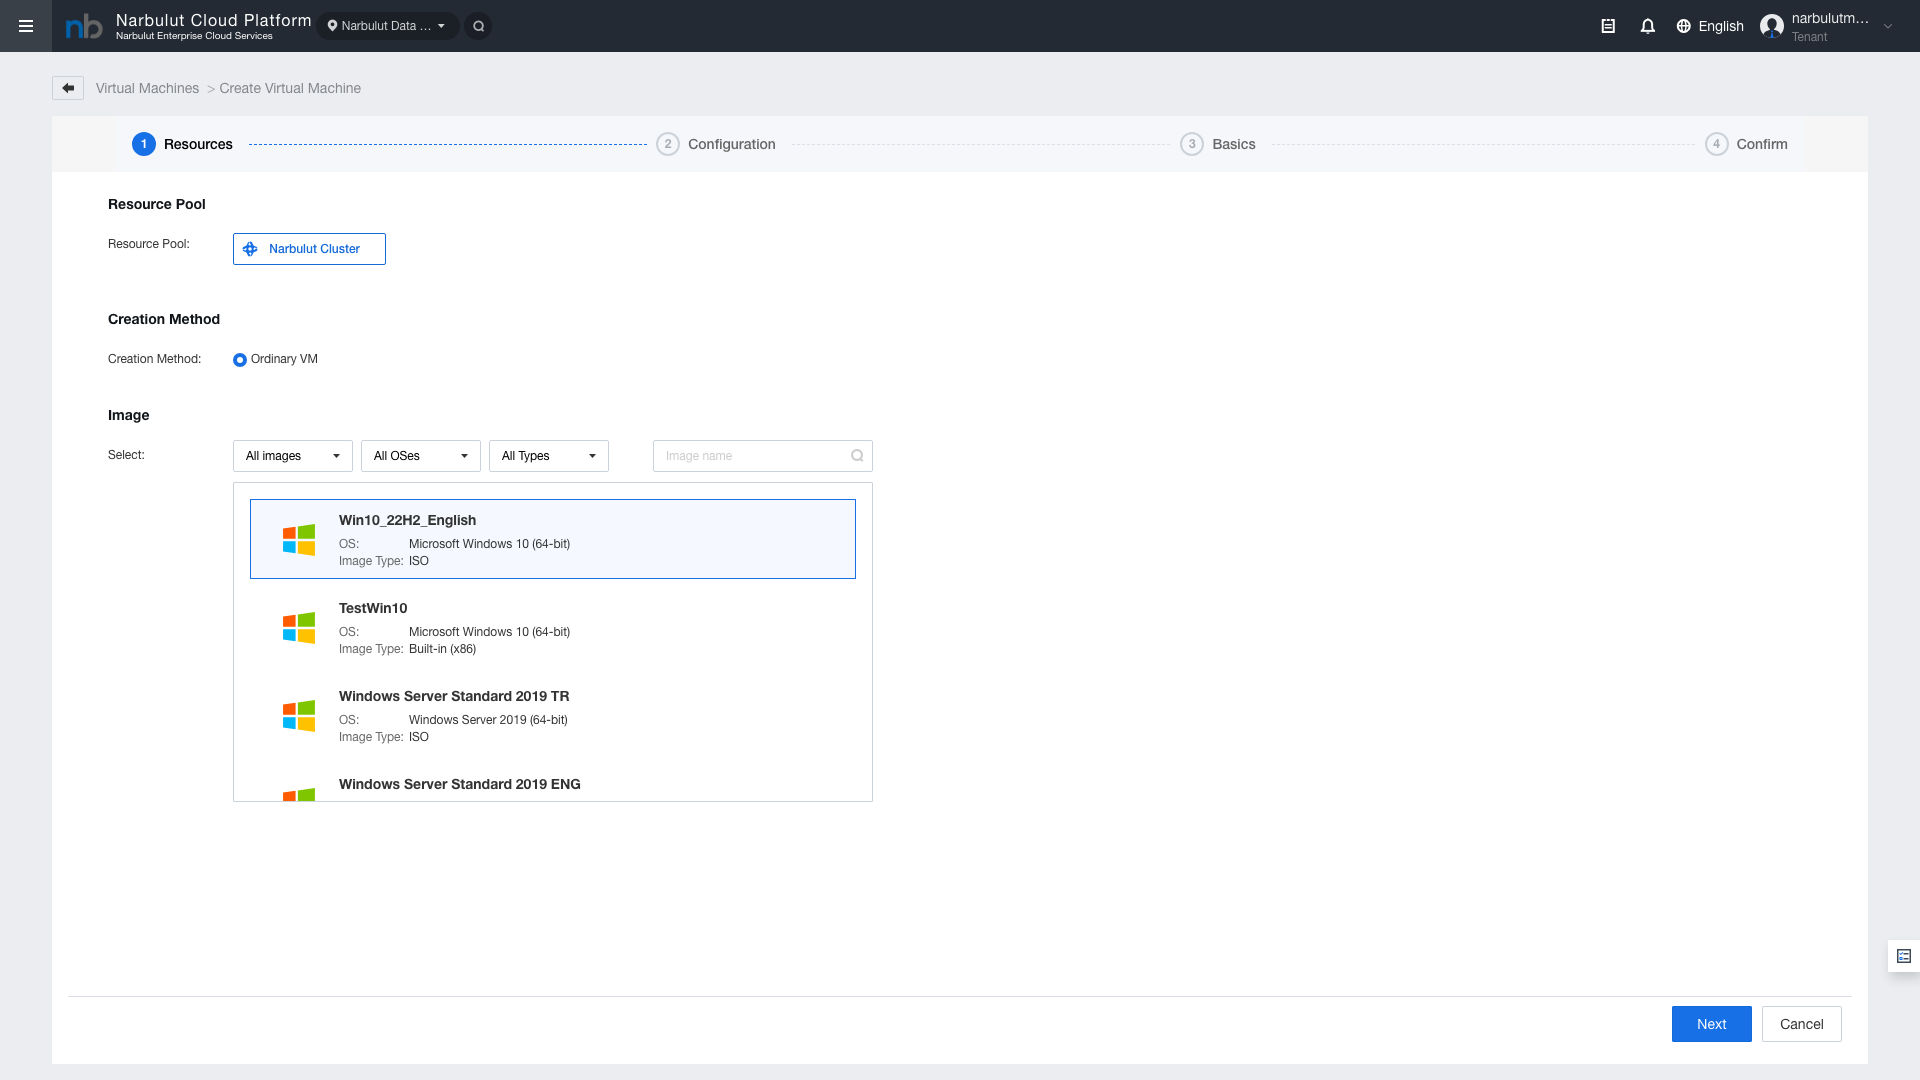
Select the operating system image for the virtual machine. Click on an image in the list to select it — the selected image is highlighted with a blue border.
Figure 3 — Image selection: selected image highlighted with blue border
Image Type
Description
Usage
ISO
Images booted from installation disk
OS installation is performed manually
Built-in (x86)
Pre-installed, ready-to-use images
Recommended for quick start
Deployment Method
When a Built-in image is selected, deployment method options appear:
Method
Description
Advantage
Full Deployment
Creates a full copy of the image
Stable performance, independent disk
Quick Deployment
Uses linked clone
Faster creation, less disk usage
Note: When Quick Deployment is selected, some features such as disk editing and cloning are limited.
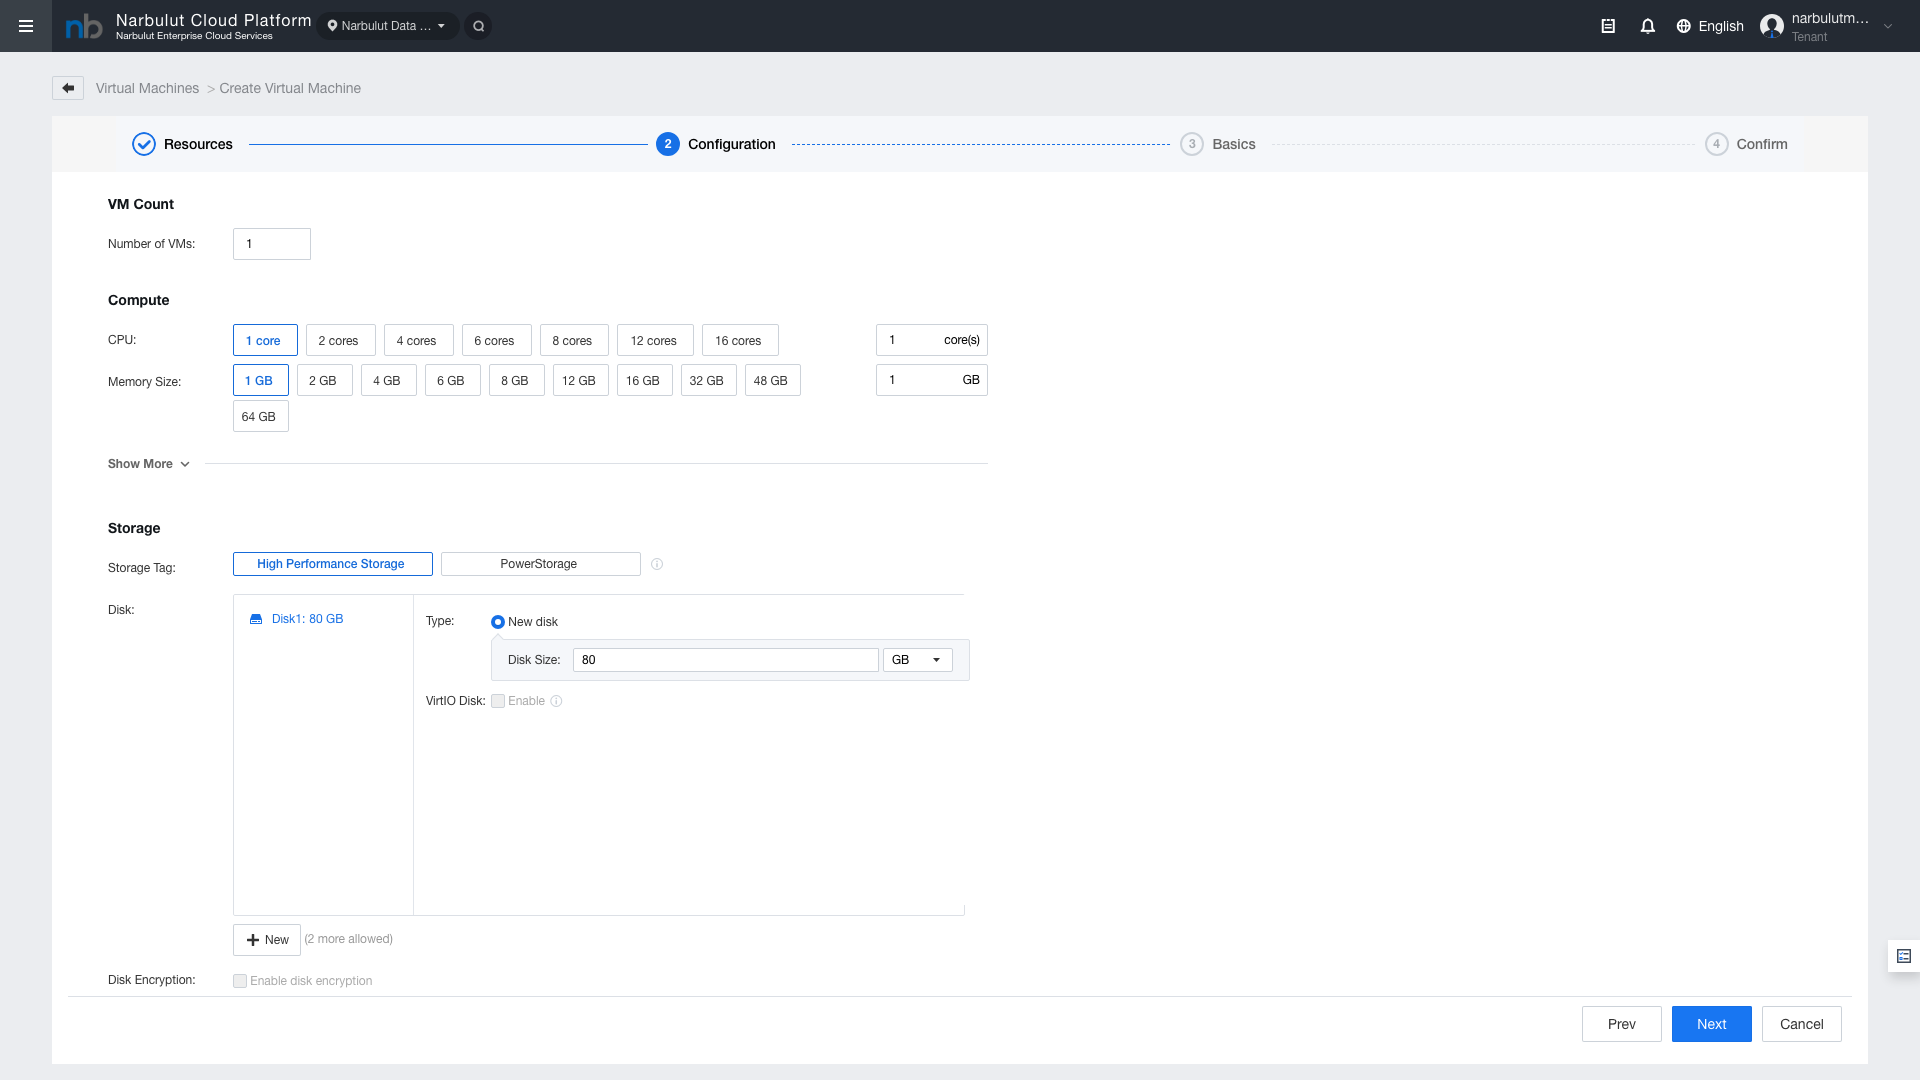
4. Step 2: Configuration
In this step, you configure the hardware resources (CPU, RAM, Disk, Network) for the virtual machine.
Figure 4 — Step 2: Configuration (Compute and Storage)
Compute (CPU and RAM)
Field
Options
Default
CPU
1, 2, 4, 6, 8, 12, 16 cores or custom value
1 core
Memory Size
1, 2, 4, 6, 8, 12, 16, 32, 48, 64 GB or custom value
1 GB
Storage
Field
Description
Storage Tag
Storage pool: High Performance Storage or PowerStorage
Disk
System disk size. Default 120 GB
+ New
Add additional disk (up to 64 disks total)
VirtIO Disk
VirtIO disk driver. Recommended to keep enabled for performance
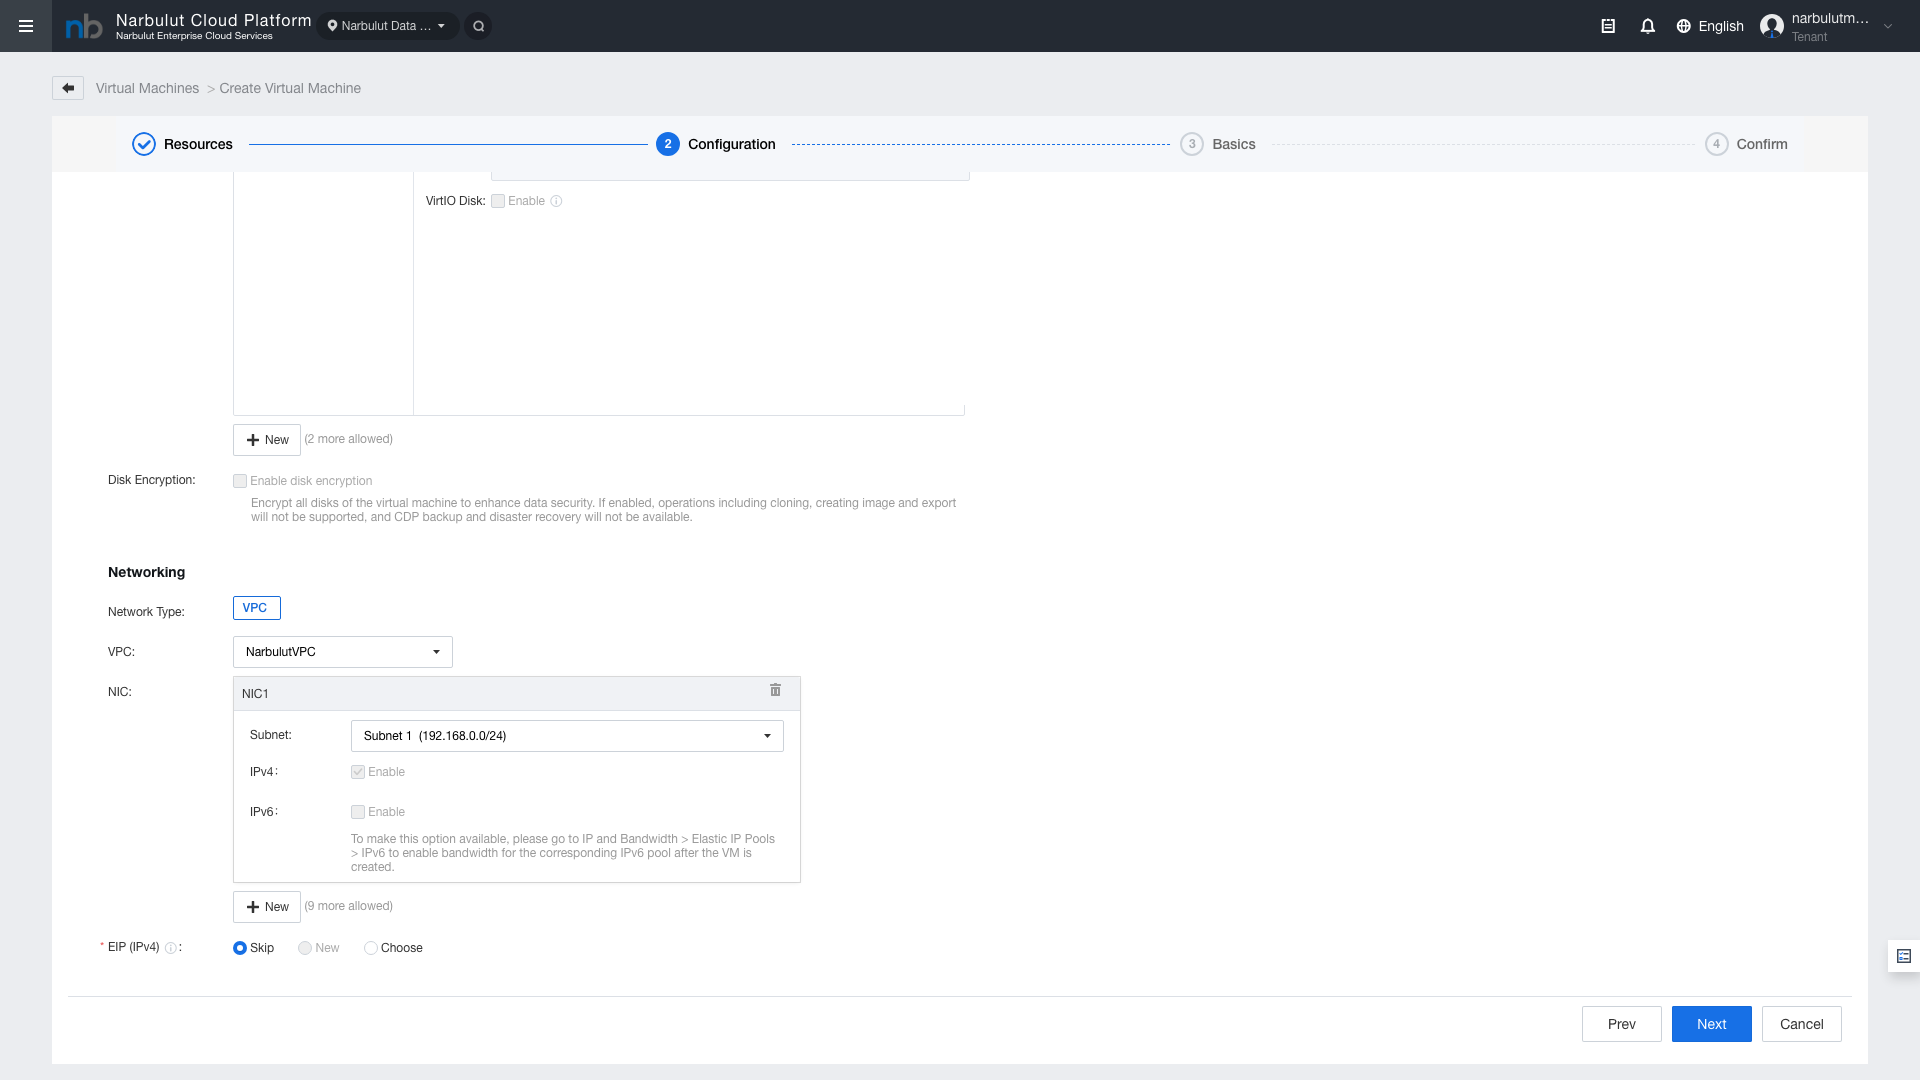
Disk Encryption
Disk encryption. Can be enabled for security
Note: When Disk Encryption is enabled, cloning, image creation, export, CDP backup, and disaster recovery are not supported.
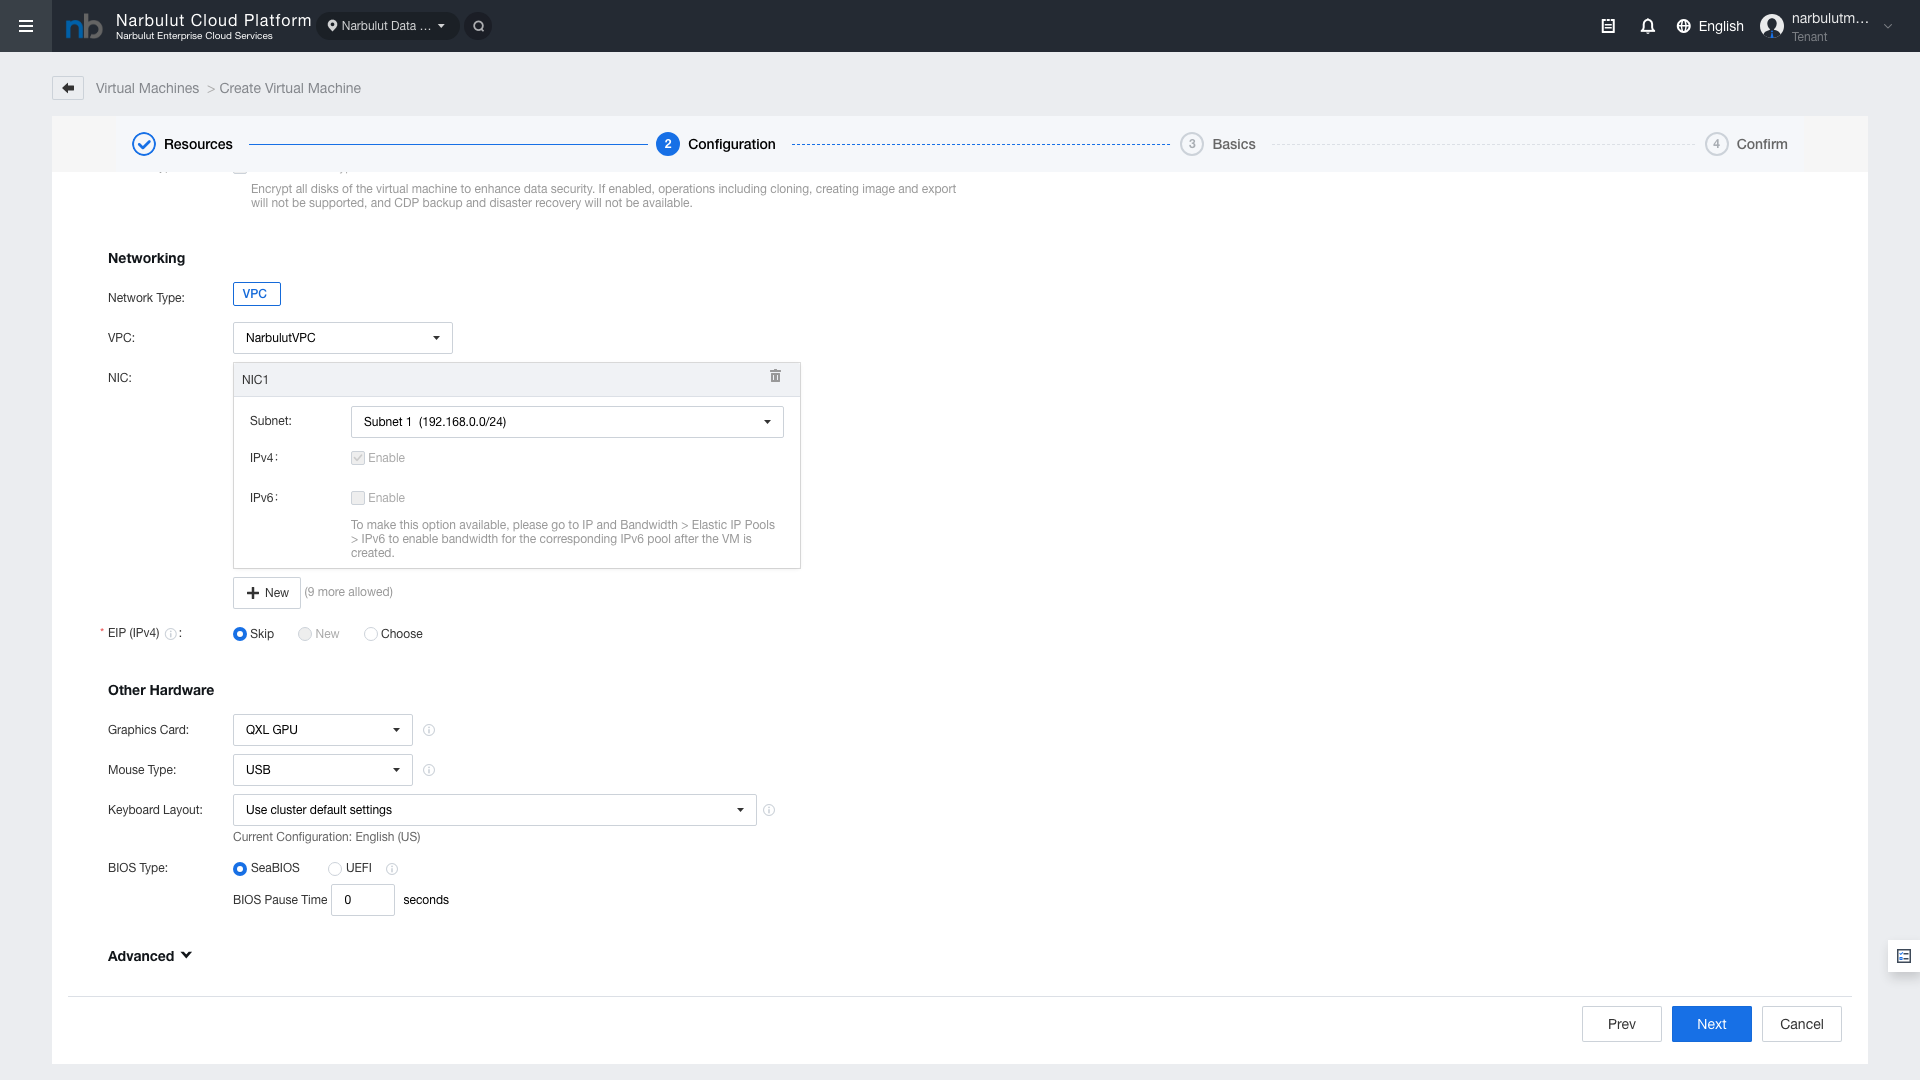
Networking
Figure 5 — Network Configuration: VPC, Subnet, NIC settings
Field
Description
Network Type
Network type: VPC (Virtual Private Cloud)
VPC
VPC selection
NIC
Network interface. Add up to 10 NICs with "+New"
Subnet
Subnet selection
IPv4
IPv4 protocol (default: enabled)
Other Hardware
Figure 6 — Other Hardware settings
Field
Description
CD/DVD Drive
Virtual CD/DVD drive — for mounting ISO files
USB
USB device support
Graphics Card
Graphics card type (VGA, QXL, VirtIO-GPU)
Mouse Type
Mouse type
Keyboard Layout
Keyboard layout (default: English US)
BIOS Type
BIOS type (Legacy BIOS or UEFI)
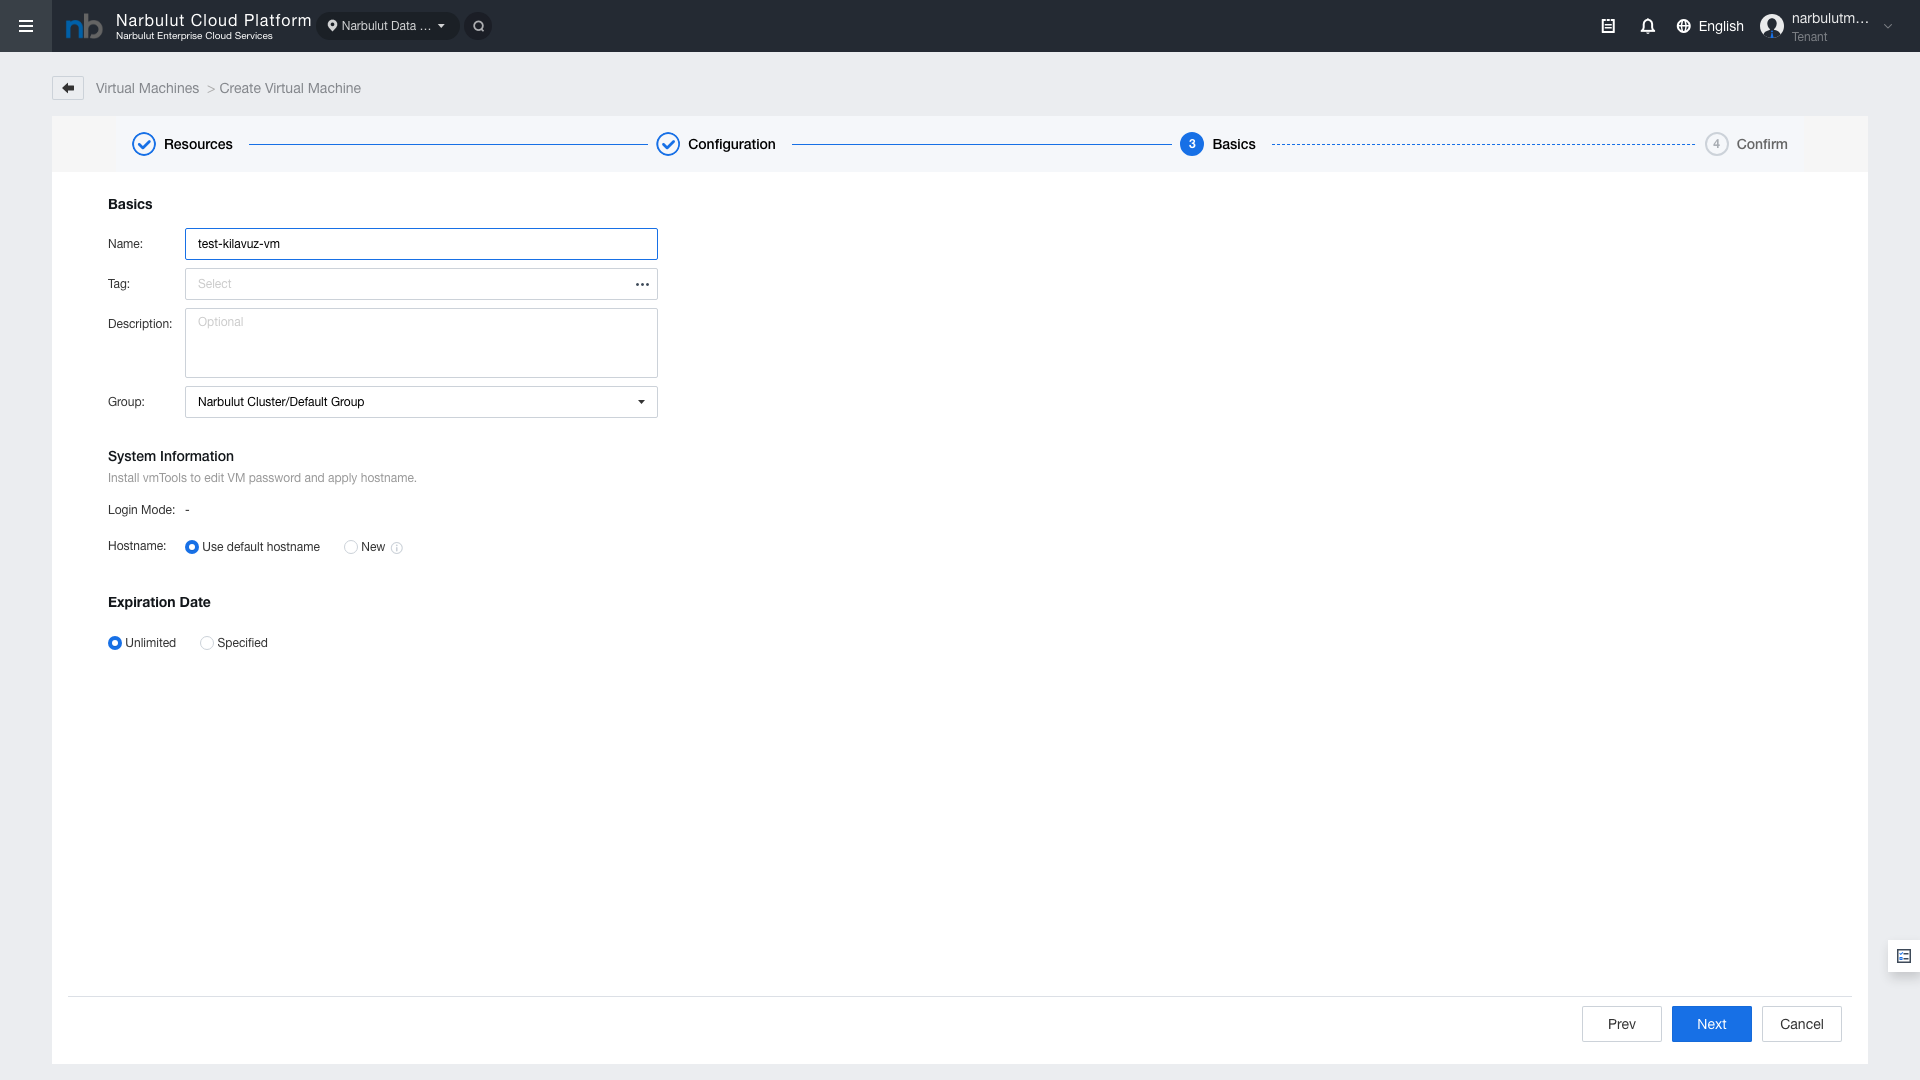
5. Step 3: Basics
Enter the virtual machine name, description, group, and other basic information.
Figure 7 — Step 3: Basics
Field
Description
Required
Name
Virtual machine name
Yes
Tag
Tag — for categorizing VMs
No
Description
Description text
No
Group
VM group (default: Default Group)
No
System Information
Field
Description
Computer Name
Computer name within the operating system
Administrator Password
Administrator password (for Built-in images)
Tip: The Computer Name field is the computer name that appears within the operating system after the VM is created. Choose a name that follows your organization's naming conventions.
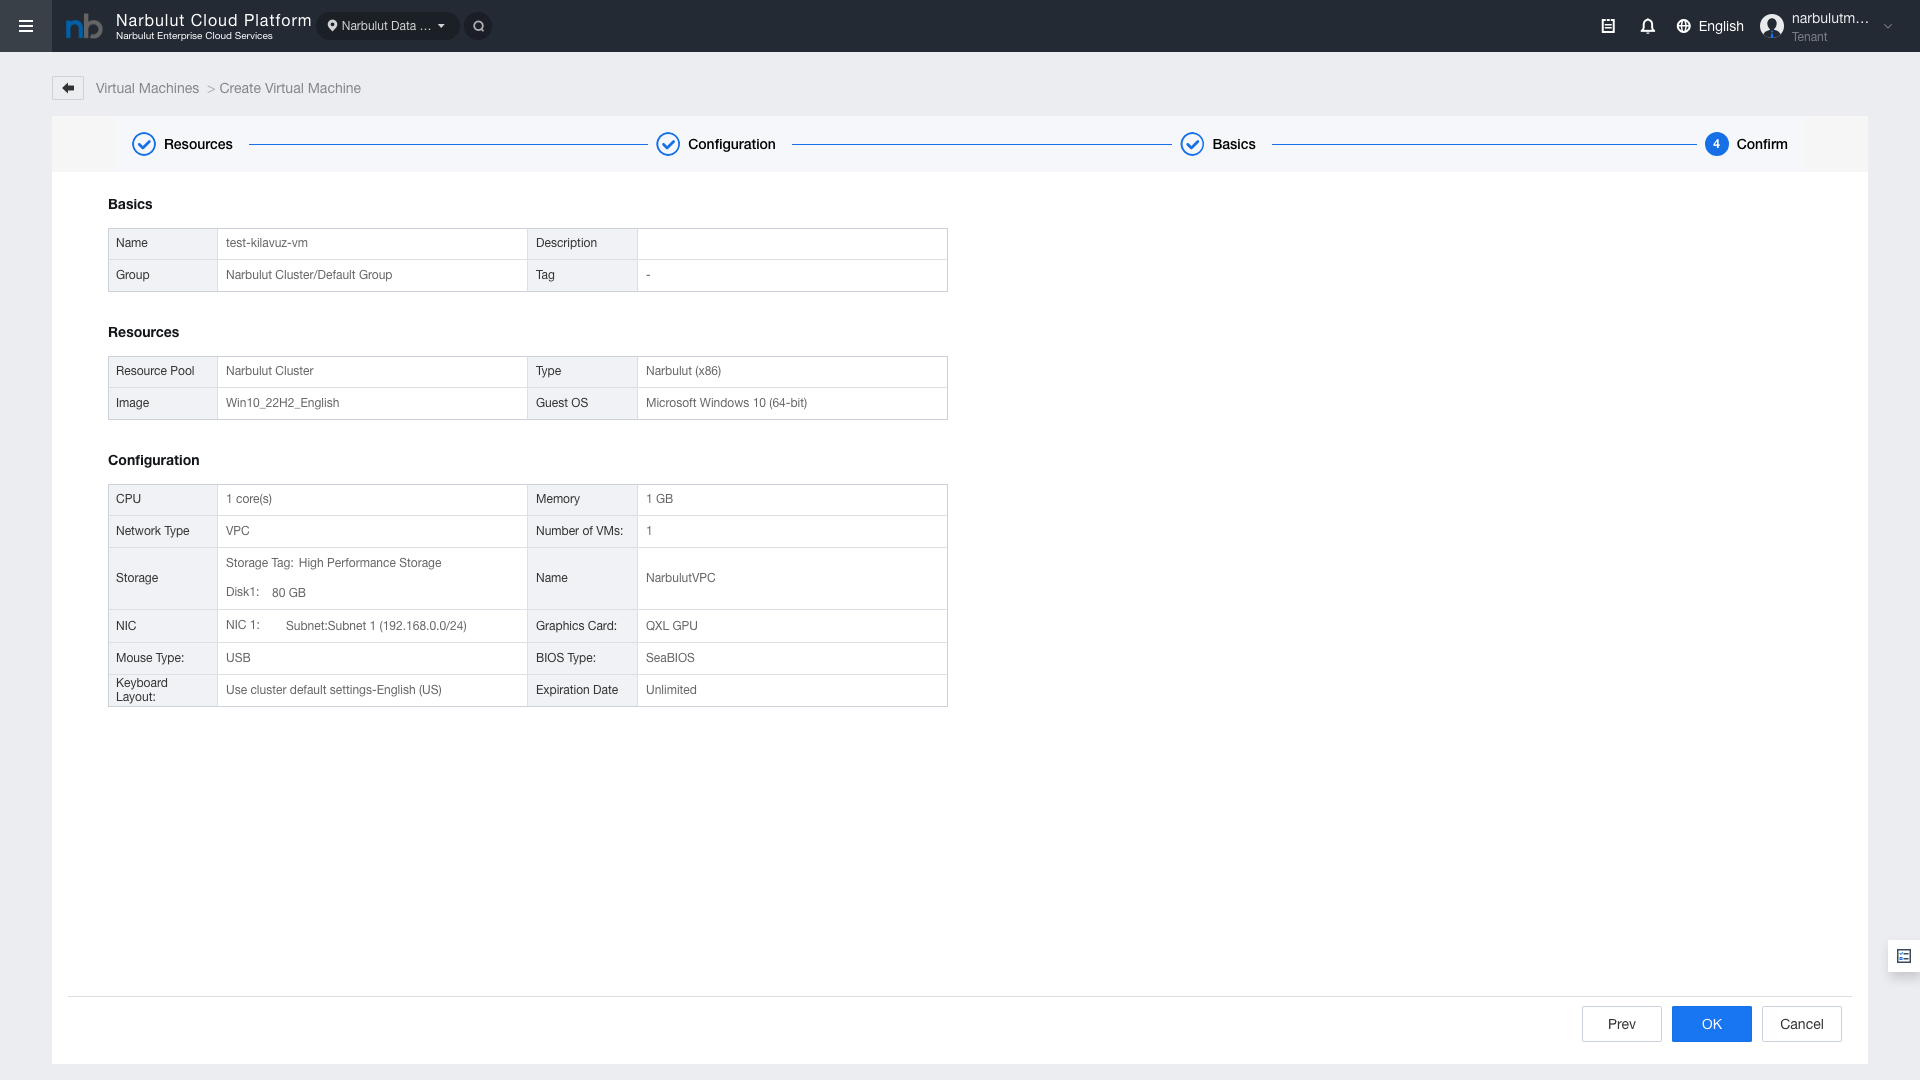
6. Step 4: Confirm
In the final step, review the summary of all your configuration settings. If the settings are correct, click “Confirm” to create the virtual machine.
Check VM Status — Verify that the new VM is in Running state in the Virtual Machines list.
Console Access — Click the Console button on the VM row to access the operating system.
IP Address Verification — Verify that the VM has received an IP address matching the network configuration.
Network Connectivity — If external access is needed, configure Elastic IP assignment and ACL rules.
8. Recommended Configurations
Use Case
CPU
RAM
Disk
Network
Web Server
2 Cores
4 GB
120 GB NVMe
1 NIC
Database Server
4 Cores
8 GB
250 GB NVMe
1 NIC
Application Server
4 Cores
8 GB
120 GB NVMe
1 NIC
Development/Test
2 Cores
4 GB
80 GB NVMe
1 NIC
Tip: These values are starting recommendations. Actual resource requirements may vary depending on your application's workload profile. CPU and RAM values can be increased after VM creation.